Showing posts with label cake. Show all posts

Thursday, April 5, 2012

Step 1: Get more coffee.

I'd like to interrupt regularly scheduled programming to introduce you to the BEST IDEA I'VE EVER HAD! (Don't worry, there will be a recipe for a lovely Lemonhead cake at the very end, but stick with me, this will be good!) See? Preview. Mmmmm.

Lemon Head Cake Slices

First though, read this article or the rest will seem crazy. Done? Good.

So, today I was IM'ing with my sister and my friend Joy, reading the above article on NPR, and (ahem) finishing off my latte when a genius idea came to me! It started innocently enough.

I kind of want a live bilby for a pet," I said to Irina and Joy. "I'll call him Billy the Bilby".

Silence.

Fueled by their lack of enthusiasm, or possibly their abundance of actual work, I started thinking and IM'ing (be warned, the following is full of genius and exclamation marks):

"So um, this bilby would make the best pet EVER.
Why? He's a marsupial.
Meaning? I can hide stuff in his pouch, basically making it a pet purse.
Yes, I said it. PET AS PURSE!
We can breed them in different colors!
Save a dying species AND GET RICH!
Must include picture of the MAJESTIC pet that looks like a cross between a bunny, a rat and a kangaroo in promo material to get people to buy in on this idea."

At this point my sister told me she had to work and Joy said something about being sued in the future because someone's purse scratched their eyes out. My sweet bilby? Never! She then said something about it looking like a mutant.

"This is like a FRANKENBUNNY accessory!" I typed, "If Dr. Frankenstein had a wife, she'd buy one of these in every color."

Propelled by my own ingenuity I typed:
"Just imagine training it to carry the TV remote IN. IT'S. POUCH! That way it can still bring you a beer in it's front paws!"
"Bonus feature? He'll eat bugs so they don't bug you! Can YOUR purse do that?"

There may have been a few negative remarks from Joy after that but all in all, I think I won the argument as no one has so far come up with a single reason why this would be a bad plan (humanitarian issues will be dealt with at a future date).

So, reason I share this anecdote with you: I'm looking for investors/supporters to get this idea off the ground. If you truly want to be a part of this life altering endeavor, I strongly urge you to .....

.... Send Anna (me) more coffee!


Oh yeah, and I promised you cake.


Lemon Head Cake

Light Lemonhead Cake
Adapted from: Souvlaki For The Soul. I kicked up the lime and the result tasted like a moist tender reincarnation of a lemonhead candy. In other words? Awesome...though not as awesome as a bilby.

1 cup Greek yogurt, I used low-fat, but obviously fat will taste good too :D
1/3 cup of olive oil, I used Persian Lime olive oil from The Olive Tap
1 cup sugar
zest of all the limes you're going to juice (3 did it for me)
1/4 cup lime juice
2 eggs
1 3/4 cups of sifted plain flour
1 1/2 tsp baking powder
1/2 tsp salt
1/2 tsp lime oil (optional)

- Pre-heat your oven to 350F.
- Grease a 9" spring-form baking pan or two mini loaf pans with a bit of olive oil or butter.
- In a large bowl mix all the wet ingredients until well combined.
- Dump the dry ingredients over wet and fold in with a spatula just until combined. Don't overdo it or the batter will be too dense.
- Pour into the baking tin(s) and cook for about 45-50 mins. The cake is ready when it has browned on top and a toothpick comes out clean.
- Cool in the pan for a few minutes and then invert onto a plate. You can either make some basic icing to top it (just mix some powdered sugar and lime juice or milk) or leave it plain. It tastes amazing along side a cup of tea.


P.S. So today we were discussing just how exactly did a male bunny end up being the bringer of painted chicken eggs and how exactly both of those things were tied to Easter and I came across a Mental Floss article on the subject (LOVE this magazine by the way). The best part though came from one of the readers who shared the following story:

"I grew up on a farm with chickens, so I knew where eggs came from: chicken butts. So when I was told the Easter Bunny laid eggs, I figured the eggs came from his butt. In anticipation of the holiday, I prepared for the holiday by making a nest for the Easter Bunny, sort of the way I would also hang a stocking for Santa. The nest would be a place where the Easter Bunny laid me some Easter eggs. But then, when the Easter Bunny left me such gifts as a BB gun and a box kite, I imagined him pooping me such toys from his butt. I felt sorry for him, imagine how much that must hurt."

You're welcome.

Thursday, March 29, 2012

Peach Bread and Farm Fresh Eggs

I'm in major spring cleaning mode in my house right now. Essentially, the house looks like a tornado went through it, dashing magazines, clothes and books all over, but kindly leaving little clear paths between the rooms for me to walk on. I know this sounds counter-intuitive and not at all like cleaning, but I'm not just moving things around, I'm actually getting rid of a LOT of the clutter. Stuff is being listed on Craigslist (and boy has THAT been a fun little experience), sorted into donation boxes, and packed up to give away to friends and family. The more I dig the more I realize that in just 6 or 7 short years that I've lived in my tiny little home, I've accumulated enough "stuff" to impress Madame Trash Heap.

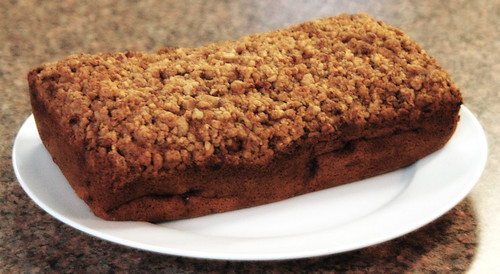
Among the things being cleaned out is the fridge. All of the mystery jars and random little tid bits have been cleared out and I've moved onto the freezer. That will take some time, I have a LOT of frozen fruit I never got to still left over from last summer/fall. I guess this winter has been busier then I thought. The first to go was the leftover bag of peaches I had brought back from a camping trip to Michigan last fall. I don't like using frozen fruit for pies, but in this lightened version of Peach Bread, they were lovely. The bread itself is not too sweet, quite moist, and very flavorful. The perfect thing to go with a cup of tea in the morning, afternoon, or a late night cleaning marathon. Hard work requires a few rewards, after all.

Peach Bread

Peach Bread
Adapted from Honey & Jam (one of my new favorite blogs).
I increased the measurements by 1.5 because my pans are a bit bigger and I wanted taller loaves, but feel free to halve the amounts if you only want 1 loaf or decrease by 1/3 if your pans are smaller. I also left my peaches in bigger chunks and used a bit more then called for because I really love it when fruit forms little sweet pockets in the bread and it felt silly to hang onto just a half a cup of peaches. The batter held the extra fruit like a champ.


5 eggs
1.5 cup dark brown sugar 3/4 cup white sugar
3 teaspoons vanilla extract
3/4 cup vegetable oil
3/4 cup applesauce
3.5 cups roughly diced peaches, drain well if using frozen
4.5 cups all-purpose flour
1.5 teaspoon baking powder
1.5 teaspoon salt
1.5 teaspoon baking soda
2.5 teaspoons ground cinnamon

1. Preheat oven to 350F. Grease and lightly flour two 9 x 4 inch loaf pans.
2. In a large bowl, beat the eggs lightly. Blend in the sugar, oil, applesauce and vanilla. Add flour, baking powder, baking soda, salt, and cinnamon; mix just to combine. Stir in the peaches. Pour batter into prepared pans.
3. Bake for about 1 hour, or until a tester inserted in the center comes out clean.


On a slightly unrelated note, a few weeks back I visited my friend's sister's house and got to meet her 4 adorable red-headed chickens. Her husband had built them an ingenious penthouse coop and I've never seen happier chickens then these. It was already getting dark and I didn't have my camera with me anyways, so sadly I don't have pictures of the girls for you, but I was lucky enough to be given 6 of the beautiful, super fresh eggs to take home with me.

Eggs

I'm still thinking of what to do with them to really let the eggs shine, but the first two got made into breakfast. I wanted to keep it as simple as possible, so these are sunny side up eggs fried in just a slick of olive oil and with a hearty dash of sea salt and freshly ground pepper.

Egg Owl

I may be biased considering I've met the chickens, but I think the whites were fluffier and the yolks were creamier in these eggs. I don't have room to keep chickens of my own, and considering all the baking I do buying local eggs is a bit out of my price range, but I think I'll need to splurge occasionally because these really were amazing.

Egg Last Bite

Monday, September 6, 2010

Banana Cake with Peanut Butter Frosting

I love labor day weekend. It's the last long weekend where I can relax before the insanity of the holidays truly kicks in. It's one of the last weekends for BBQs here where the weather is starting to cool. I can finally turn off the AC and fling open the windows. It's the end of summer without quite feeling like the start of fall.

Peanut Butter Banana Cake

It's also the time when I no longer hesitate to turn on the oven, so I didn't even blink when my friend requested a cake for her husband's birthday, which was this past Sunday. "It must have peanut butter!" she said, and after a few emails back and forth we decided on a banana cake with peanut butter frosting (and a couple of ice creams, of course).

Peanut Butter Banana Cake 2

I have two simple recipes for peanut butter frosting, one of which I used a while back for my puppy cupcakes, but the banana cake would take a bit more research. I didn't want it to be as heavy as a banana bread. I wanted it more cakey, so when I found a recipe on Allrecipes with so many fantastic reviews, I thought I'd give it a try.

Peanut Butter Banana Cake 4

The cake came out great, and despite all the other food at the party, there was still a considerable dent made in the three layer cake. I even pulled out one of my pretty cake stands. Usually when I sell cakes or make them for parties I won't be attending, I don't want to worry about getting my containers or plates back, so I put the cakes on cardboard rounds and into cardboard boxes, but I have four cake plates that sit unused and unloved, waiting for a cake to be made that doesn't have to leave the house. It was nice to pull one down and give it purpose.

Peanut Butter Banana Cake 3

Banana Cake with Peanut Butter Frosting
recipe adapted from AllRecipes

Note: I increased the cake recipe to make 3 9-inch layers and I sort of made up the frosting to match, but be aware that this is a very rich cake, so serve a slice with a tall glass of milk.


3-3/4 cups all-purpose flour
1 tablespoon and 1-1/2 teaspoons baking soda
1-1/2 pinches salt
3/4 cup unsalted butter
1-1/2 cups white sugar
1 cup and 2 tablespoons light brown sugar
3 eggs
6 ripe bananas, mashed
1 cup buttermilk

- Preheat oven to 350 degrees F. Grease and flour 3 - 9 inch round pans.
- In a small bowl, whisk together flour, baking soda and salt; set aside.
- In a large bowl, cream butter, white sugar and brown sugar until light and fluffy. Beat in eggs, one at a time. Mix in the bananas.
- Add flour mixture alternately with the buttermilk to the creamed mixture. Pour batter into the prepared pans.
- Bake in the preheated oven for 30 minutes. Allow to cool completely before frosting.

Peanut Butter Frosting
recipe by me

2 cups peanut butter
2 sticks unsalted butter, room temp
1 cup powdered sugar
1/2 cup heavy cream

Whip together the first 3 ingredients until smooth and a bit lightened. Slowly drizzle in the heavy cream until the frosting comes to the consistency you like. Feel free to add more sugar if you like things sweeter or of you want a bit of a thicker frosting. Spread a thin layer between the layers of the banana cake and use the rest to frost the top and sides.

If you keep the cake in the fridge, be sure to take it out and let come to room temp before serving. Also, if you like chocolate, I would also recommend possibly adding a layer of ganache into the middle of the cake.

Tuesday, July 13, 2010

Death By Chocolate


I will only share a small part of this recipe with you today. It's not that I don't want to share, I do, it's just that the recipe is long. Very very long. I like my fingers and I don't want them to fall off. Oh, and I'm too lazy to type it out. And besides, you should get the book, it's fantastic! The book in question is Death by Chocolate: The Last Word on a Consuming Passion. I've had this book for years, in fact it was one of the first in my collection and everything I've ever made from it has come out sublime. And the meringue recipe I'm including at the bottom is so multi-purpose that I'm sure you'll forgive me for not including the rest.

Death By Chocolate

The recipe I'm here to tell you about is the very last one in the book, the one that the whole book is named after, the one and only "Death By Chocolate" cake. It consists of a layer of a decadent brownie, a layer of rich ganache, a layer of cocoa meringue, a thick layer of chocolate coffee mousse, another layer of brownie, a thick coat of that rich ganache, and a thick piped topping of yummy chocolate mousse. Oh, and if that's not enough chocolate for you, it comes with a chocolate rum sauce on the side, you know, to really nail in that coffin. You can't eat this cake without going into a minor chocolate coma or without having bits of chocolate all over your face leaving you wondering how it got there. And with the extra meringue batter, extra mousse, and extra ganache you will inevitably end up with, you can make these yummy little sandwiches, that won't tip you over, but will make you swoon.

Chocolate Sandwiches

Cocoa Meringue
via Death by Chocolate: The Last Word on a Consuming Passion

4 egg whites
1/8 tsp cream of tartar
1/8 tsp salt
1 1/4 cup sugar, divided
2 Tbsp unsweetened cocoa powder
1 Tbsp corn starch

- Preheat the oven to 225F.
- If you want this to be a layer in a cake, using a 9 inch cake circle as a guide, trace a circle with a pencil on a sheet of parchment paper cut to fit a baking sheet. Turn the paper over and, with trace mark down, place on a baking sheet. Or you can just make freehand shapes to make sandwiches.
- Place 4 egg whites, the cream of tartar, and salt in the bowl of an electric mixer fitted with a balloon whip and whisk on high until soft peaks form, about 45 to 50 seconds.
- Gradually add 1 cup sugar while continuing to whisk on high and whisk until stiff, about 1 1/2 minutes.
- Remove the bowl from the mixer and use a rubber spatula to fold in and thoroughly combine the remaining 1/4 cup sugar, 2 tablespoons cocoa and the cornstarch.
- Fill a pastry bag (fitted with a large round tip) with the cocoa meringue. Fill the traced parchment shapes with meringue: start in the center and pipe a 3/4-inch wide spiral towards the outside.
- Place the meringue in the preheated oven and bake for 15 minutes. Lower the oven temperature to 200 degrees Fahrenheit and bake for 2 hours and 45 minutes. Remove from the oven and allow to cool for 45 minutes before handling. Don't skip this part, the meringues will crack if handled too soon.
- Fill with ganache, chocolate mousse or whatever you like and enjoy!

So the moral of this story is, get the book, make the cake, and acquire about a dozen marriage proposals or kill off a few sugarholic friends. Enjoy :D

Monday, June 14, 2010

German Chocolate Cake


How could I have possibly gone this long without ever even trying to make a German Chocolate cake? It's such a popular cake that you can always find it behind the glass of any decent sized bakery and yet it never even crossed my mind as I flipped through the recipe pages of a new book or in my head, thinking up the next experiment. Well, all that changed this weekend. There was a surprise 50th birthday in the works and my friend asked me to help out, so along with a giant batch of coleslaw and a tub of meat balls, I'd also be bringing a huge cake. And the birthday girl's favorite was German Chocolate and birthday girl gets what birthday girl wants. No wiggle room. So I set out to find the ultimate recipe and once again, I found the most promising one written up by David Lebowitz.

German Chocolate Cake

Since it was my first time making this cake I decided not to mess with it, so aside from doubling the recipe, I left well enough alone and got started as soon as I got home from work on Friday. The cake layers came together quickly and with a minimum of fuss and came out of the oven looking fantastic. And that's about where my luck ran out. I made the coconut filling, bringing the mixture to the specified temperature, mixing in the nuts and coconut and setting it aside to cool, and theoretically to thicken as well. But as the clock ticked by and the night got later and later, the mixture stayed thin and runny. Uh oh.

"Just a few more minutes" I thought, as I got started with the chocolate icing, but as that was sitting in a bowl cooling, my patience wore a bit thin. I dumped the filling back into the pot and set it back to cook, bringing it up to 200F this time. I added an extra half a cup of coconut and an extra half cup of nuts and once again set it aside to cool. Half hour later it was perfect and I breathed a sigh of relief.

Cake layers cut, drizzled with syrup, spread with filling and carefully stacked, I turned to my icing, only to find that it too betrayed me by staying much too runny to spread. This time I figured the fix would be much easier. I melted another 4 ounces of chocolate and carefully folded it in. A few minutes later it was perfect, but by this time the clock was chiming midnight. The cake iced and stored in the fridge, I tossed all the bowls in the sink and stumbled off to bed. The cake came out great, and I have learned what to look for in terms of "doneness" next time, so all in all the experiment was a success (at least according to the birthday girl), even if it did cut into my sleep time.

German Chocolate Cake 2

German Chocolate Cake
One big, tall 9-inch cake; about 16 servings
Adapted with minimal adjustments from David Lebowitz


For the cake:
2 ounces semisweet chocolate chopped
2 ounces unsweetened chocolate, chopped
6 tablespoons water
8 ounces (2 sticks) unsalted butter, at room temperature
1 1/4 cup + 1/4 cup sugar
4 large eggs, separated
2 cups all-purpose flour
1 teaspoon baking powder
1 teaspoon baking soda
½ teaspoon salt
1 cup buttermilk, at room temperature
1 teaspoon vanilla extract

For the filling:
1 cup heavy cream
1 cup sugar
3 large egg yolks
3 ounces butter, cut into small pieces
1/2 teaspoon salt
1 cup pecans, toasted and finely chopped
1 1/3 cups unsweetened coconut, toasted

For the syrup:
1 cup water
3/4 cup sugar
2 tablespoons dark rum

For the chocolate icing:
10 ounces bittersweet or semisweet chocolate, chopped
2 tablespoons light corn syrup
1 1/2 ounces unsalted butter
1 cup heavy cream

1. Completely cover two 9-inch cake pans with wax paper and spray with Pam, the one with flour in the mix. Preheat the oven to 350°.
2. Melt both chocolates together with the 6 tablespoons of water in a glass bowl in the microwave, stirring at 15 second intervals. You can also use a double-boiler, but I feel it involves too many dishes to wash. Stir until smooth, then set aside until room temperature.
3. In the bowl of an electric mixer, or by hand, beat the butter and 1 1/4 cup of the sugar until light and fluffy, about 5 minutes. Beat in the melted chocolate, then the egg yolks, one at a time.
4. Sift together the flour, baking powder, baking soda, and salt.
5. Mix in half of the dry ingredients into the creamed butter mixture, then the buttermilk and the vanilla extract, then the rest of the dry ingredients.
6. In a separate metal or glass bowl, beat the egg whites until they hold soft, droopy peaks. Beat in the 1/4 cup of sugar until stiff.
7. Fold about one-third of the egg whites into the cake batter to lighten it, then fold in the remaining egg whites just until there's no trace of egg white visible.
8. Divide the batter into the 2 prepared cake pans, smooth the tops, and bake for about 45 minutes, until a toothpick inserted into the center comes out clean. (Check it at 35 minutes if you're using pans bigger then 9", you don't want the cake to dry out too much or burn).

Cool cake layers completely and while the cakes are baking and cooling, make the filling, syrup, and icing.

To make the filling:
1. Mix the cream, sugar, and egg yolks in a medium saucepan. Put the 3 ounces butter, salt, toasted coconut, and pecan pieces in a large bowl.
2. Heat the cream mixture and cook, stirring constantly (scraping the bottom as you stir) until the mixture begins to thicken and coats the spoon (an instant-read thermometer will read 190°.)
3. Pour the hot custard immediately into the pecan-coconut mixture and stir until the butter is melted. Cool completely to room temperature. (It will thicken.)

To make the syrup:
In a small saucepan, heat the sugar and water until the sugar has melted. Remove from heat and stir in the dark rum. Don't drink it, no matter how good it smells. I promise, there will be some left over for spiking cocktails.

To make the icing:

1. Place the 10 ounces of chopped chocolate in a bowl with the corn syrup and 1 1/2 ounces of butter.
2. Heat the cream until it just begins to boil. Remove from heat and pour over the chocolate. Let stand one minute, then stir until smooth. Let sit until room temperature.

To assemble the cake:
Remove the cake layers from the pans and cut both cake layers in half horizontally, using a serrated bread knife.
Set the first cake layer on a cake plate. Brush well with syrup. Spread 3/4 cup of the coconut filling over the cake layer, making sure to reach to the edges. Set another cake layer on top.

Repeat, using the syrup to brush each cake layer, then spreading 3/4 cup of the coconut filling over each layer, including the top. (I only had a little topping left for the top, so I just made the chocolate border wider to compensate, so no worries if you run low).

Ice the sides with the chocolate icing, then pipe a decorative border of chocolate icing around the top, encircling the coconut topping. I find that cakes that you add syrup to get better on the 2nd day, so make this the night before and store in the fridge overnight.

Saturday, March 27, 2010

Homely Decadence


Chocolate Truffle Cake

I don't know if it's laziness or an attempt to get at the basics, but I've been enamored with simple recipes lately. Gone are the days of four page recipes requiring a minimum of six separate components or twenty page recipes requiring a "team of people". I've come to love the idea of a few quality ingredients coddled in a bowl to make an unforgettable, if somewhat homely, treat. This cake is another example of that. There are 5 ingredients. That's it. That and less then an hour of your time is all that's needed to indulge in this truly decadent cake. I'm sure you have most of them in your pantry right now, too.

I made it a few days ago to go along with the mussels, because rich chocolate cake stands up beautifully to two bottles of wine and girl talk. It did not disappoint.

Chocolate Truffle Cake

Kate's Winning-Hearts-and-Minds Cake
from Orangette

7 ounces (200 grams) best-quality dark chocolate
7 ounces (200 grams) unsalted European-style butter (I used regular and it still came out great), cut into ½-inch cubes
1 1/3 cup (250 grams) granulated sugar
5 large eggs
1 Tbs unbleached all-purpose flour

Preheat the oven to 375 degrees Fahrenheit, and butter an 8-inch round cake pan. Line the base of the pan with parchment, and butter the parchment too. Make sure everything is well covered. You do NOT want to try and pry this jiggly cake out by force.

Finely chop the chocolate (a serrated bread knife does an outstanding job of this) and melt it gently with the butter in a double boiler or in the microwave, stirring regularly to combine. Add the sugar to the chocolate-butter mixture, stirring well, and set aside to cool for a few moments. Then add the eggs one by one, stirring well after each addition, and then add the flour. The batter should be smooth, dark, and utterly gorgeous.

Pour batter into the buttered cake pan and bake for approximately 25 minutes, or until the center of the cake looks set and the top is shiny and a bit crackly-looking. Check it at 20 minutes and every two minutes after. It’s usually quite jiggly in the center and you’ll know it’s done when it jiggles only slightly, if at all. Let the cake cool in its pan on a rack for 10 minutes; then carefully turn the cake out of the pan and revert it, so that the crackly side is facing upward. Allow to cool completely, cover with saran wrap and leave in the fridge overnight. The cake will deflate slightly as it cools. You can also wrap it tightly in saran wrap and freeze it for an impromptu dessert when the mood strikes, but that's up to you.

Serve in wedges at room temperature with a loose dollop of ever-so-slightly sweetened whipped cream.

Monday, February 8, 2010

Easiest Way to Deal with Extra Walnuts


No matter what interests you may have, the internet is never short on inspiration. I tried to put baking on a bit of a hiatus for a while and concentrate on other things, but when I saw this recipe, I thought it was too simple and intriguing to pass up, so I whipped it up, in literally less than an hour. It's the most unassuming looking cake I've ever made. There's no elaborate frostings, just a smear of jam (I used the plum jam I made a few months ago), and a super simple sweetened sour cream cloud on top. I took one to my parent's house for brunch to find out how it came out and both my parents asked for seconds. The cake was perfectly moist and very flavorful, with the jam adding the sweetness and the topping adding a cool, tangy contrast to the cake. Yum! I had to make it again. This time I took it to work to try out on my co-workers. Success yet again! This is definitely a keeper. Thank you Smitten Kitchen.

Walnut Cake

I did start another little experiment this weekend. Only a day or so after reading this post about these cute little miniature watermelon looking Mexican gherkins, I found them at a European grocery store next to my parent's house and decided to give them a try. I only bought enough for two jars to see how it would come out. I gave one jar to my parents and the other one I'm holding in my fridge and I should know the results in a few days. In the mean time, I've copied the two recipes for you to try below. Try them and let me know what you think.

Mexican Pickles

Walnut Jam Cake
taken from Smitten Kitchen

Cake
1 1/4 cups walnuts, toasted (in a shallow baking pan at 350°F for 10 minutes) and cooled
2/3 cup sugar
1 stick unsalted butter, cut into pieces
4 large eggs
1 teaspoon pure vanilla extract
1/2 cup all-purpose flour
1/2 teaspoon baking powder
1/2 teaspoon salt

Topping
1/2 cup jam or preserves (Almost anything will work, I used plum)
2/3 cup chilled heavy cream
1/4 cup sour cream
1 teaspoon sugar
1/2 teaspoon pure vanilla extract

- Preheat oven to 350°F with rack in middle. Butter and flour an 8-inch round cake pan, I used the flour-spiked Pam. Less messy and super easy.
- Pulse cooled walnuts and sugar in a food processor until finely chopped. Add butter and process until combined, then add eggs and vanilla and process until combined. Add flour, baking powder, and salt and pulse just until incorporated. Spread batter in cake pan. See? I told you it was easy.
- Bake until cake is just firm to the touch and a wooden pick inserted into center comes out clean, about 30 minutes. Cool 15 minutes in pan, then turn out onto a rack and cool completely.
- Spoon jam over cake.
- Beat heavy cream with sour cream, sugar, and vanilla until it holds soft peaks, then spoon over jam.


Basic Pickling Recipe
taken from Tea&Cookies

1 quarts water

1/2 cup white vinegar

1/4 cup canning or pickling salt (I used sea salt, hopefully that was okay)

- In a large enough saucepan, add the ingredients and bring to a strong simmer, stirring until the salt has all dissolved
- Thoroughly wash the gherkins. One of the sites I saw suggested slicing off a tiny sliver from each end of the gherkin, so I did that too. It's up to you if you want to do that as well.
- Place vegetables in an impeccably clean glass container (submerge in a pot of boiling water, or run through a dishwasher and remove hot). Add any garlic or herbs, as desired. I added a 1/4 tsp coriander to each jar along with three large cloves of garlic, thinly sliced. You can add whatever you like to yours.
- Add hot brine until it covers the vegetable entirely. No bit should break the surface of the brine.
- Cover tightly and allow to cool. I waited until the jars were room temp and the lids popped inwards and then I put the jars into fridge. You’ll want to wait a few days for the to flavor develop before eating, so that's what I'm doing now.
- Can be kept in fridge for a few months—so long as no mold, scum, spoiling occurs. Monitor regularly and discard if there is any cause for concern.

Wednesday, December 2, 2009

Katie's Wedding and an Afternoon in Milwaukee


First, a quick note: I ordered a new laptop, so as soon as it's set up, you will no longer needs to wait for weeks to see an update here. Yay!

It's been over a week now, but I'm finally getting around to sharing with you guys the cake I made for my friend Katie's wedding. But before we get to that, I have a question. Have you ever walked around a seemingly large city, that feels like it's teeming with people, and yet there's not a soul on the streets? That's exactly how I felt when I went for a walk through Milwaukee, WI after setting up the cake. It felt very surreal. I couldn't help thinking that there was a huge party or something going on 10 miles away and that's where everyone was and I just didn't get the memo since I'm from out of town. It did give me a great chance to take some nice pictures and since the sun sets early these days, the light couldn't be more beautiful. This is the view from just outside the hall where the wedding was held. I love gazebos and in that golden light moment, it felt like it would be a very romantic spot to be. I couldn't help but play with the picture a bit. Doesn't it look like the city in miniature?

Tiny Milwaukee - Gazebo

Anyhow, onto the wedding. It was beautiful! The flowers, the settings, the bride, gorgeous. Even the people couldn't be nicer and I found many of Katie's friends and family to chat with. The food? Fabulous...which brings me to the cake :D (that was a smooth segway, don't you think?) If you remember from my post several months ago, Katie picked a white chocolate cake, with white chocolate ganache, blackberries and a lemon buttercream. The blackberries were to go with the lovely floral arrangements that she picked and the florist would be providing the flowers to decorate the cake, so my job would be to just bake and deliver. I don't know why, but I couldn't for the life of me remember how big she wanted the cake to be, all I remembered was her fear of tiered cakes with pillars. Something about them crashing. Silly Katie :D But since I couldn't remember, I just followed the picture she sent me showing a 4 tier cake...which turned out a little bit higher then I anticipated...okay a LOT higher. No matter. Wedding cakes are supposed to be large and impressive. They always put them on those huge tables and anything smaller than huge gets lost on it, so while it wasn't exactly what she intended, I think she was happy with the results. And in my humble opinion, it tasted even better then I remember it from the tasting. I won't even tell you how many pounds of chocolate, how many dozen of eggs, how many cases of butter, or how many tubs of berries went into it (and the backup sheet cake that was to stay in the kitchen). I'm still slightly amazed that it fit in my fridge. Isn't it pretty though?

Katie's Cake

Side note: Driving on the highway with this cake as my passenger was a nerve wrecking experience...I don't know how those people on Ace of Cakes do it.

Wednesday, November 18, 2009

How about a little game of Poker?


Poker Cakes
Any game, poker included, can be much improved by the addition of cake. Toss in a few birthdays and it sounds like an all out party. A coworker from my last job emailed me a few weeks ago asking if I'd be interested in making a couple of cakes with a poker theme for her husband's and his niece's husband's birthdays. And she was pretty open about the flavors she wanted, so after going back and forth for a bit, we decided on a rich chocolate cake, my no-carrot carrot cake, and a white chocolate dulce de leche cake. I decided not to experiment with any new recipes this time around and go with the old standby's so that I would be absolutely sure everything would come out great. I found some poker chip designs online and copied them for two of the cakes:

Poker Chip Cake
And the chocolate cake lent itself quite nicely to being turned into a poker table:

Poker Table Cake
And since the cakes were for 2 birthdays, I put two jokers on the table :D

Monday, November 16, 2009

The Biggest Cake Ever

I find myself making a lot of extreme statements lately. The best focaccia, the best hot chocolate, the greatest cookie icing ever, and while it might sound like slight exaggerations, this one certainly is not. This cake was meant to feed 175 people and it could have easily taken care of over 250, especially if you consider the tiny slices the caterers chopped this monstrosity into. It was a yummy lemon cake with a buttercream heavily spiked with fresh lemon curd and it was the wedding cake I made for my coworker's big day. For once I planned ahead, I went to Home Depot and had them cut down a block of wood to use as a base and I wrapped it with a pillow case (a quick pat on the back for resourcefulness), lined with saran wrap layered the freshly baked cakes and spread with the frosting I made the day before (I still have a day job you know), and decorated with white chocolate leaves I made while the cakes were baking. And then I went to pick it up. I tried, I really did, and I promise you, I'm no weakling, but I could not pick this thing up to save my life, let alone carry it down several flights of stairs to my car. I made this realization maybe an hour before I had to leave the house, with cake in tow, and carefully make my way to the land time forgot where the wedding was to be held.

Fran's Wedding Cake

I had to call for help. Luckily I have a friend that lives near by and after she stopped laughing at me, she grabbed her brother and rushed over to help load the beast into my trunk. I'll skip the story about how I got lost on the way there and saw the "Welcome to Indiana" sign 6 times before I finally found my exit, and just tell you that the cake was very well received...even if no one but the bride, the groom and the photographer saw it. You see, they ran to the cake right away for pictures and then the caterers whisked it into the kitchen to be cut. I was a little sad at first, but then I decided that as long as the cake was good and the bride was happy, I'm happy.

Easy Lemon Curd Recipe

1 tablespoon plus 2 teaspoons finely grated fresh lemon zest
1 cup fresh lemon juice
1 1/3 cups sugar
4 large eggs
1 3/4 sticks unsalted butter, cut into tablespoon pieces

Whisk together zest, lemon juice, sugar, eggs, and a pinch of salt in a 2-quart heavy saucepan. Add butter all at once and cook over moderately low heat, whisking constantly, until curd is thick enough to hold marks of whisk and first bubbles appear on surface, about 10 minutes. Immediately pour curd through a fine sieve into a bowl. Press plastic wrap directly onto surface of curd and chill until cold.

It should be made the day before you want to use it so it has enough time to set, and you can either slather it directly onto cakes, muffins, and toast, or whip it into your favorite buttercream recipe as I've done for the wedding cake. Be sure to lick the spoon, this stuff is great!

Tuesday, August 18, 2009

Out of the Box Fun


Cake Pops
Normally I'm against box cakes. I prefer to pour over the recipe books, pick out the best one, hunt for the best ingredients, carefully measure everything and marvel as all the separate pieces are transformed into something fragrant and beautiful. But this time I decided to just have some fun. I've been ogling Bakerella's ingenious Cake Pops for a long time now, promising myself that one day I'll give them a try. Last Friday was that day, since that's what I decided to bring to my friend's baby shower. I rushed over to a friends house having filled a large box with all the supplies and got right to work. It took less than 5 minutes to whip up a batch of Duncan Hines chocolate cake batter, pop it in the oven, set the timer and settle on the couch to catch up with my friend. Once the cake was done and cool, it was actually somewhat therapeutic to sit with a bowl on my lap and reduce what my friend lamented was a perfectly good cake into crumbs. You can go here for the full instructions, but here are a few things I learned while making these:

1. Don't add the whole can of frosting to the crumbs. Add 3/4ths and see if it's enough first or your mixture will be too soft.
2. Don't make the balls too big. Walnut size or a bit smaller is perfect.
3. Make sure you have the right size cookie cutter all set and ready to go...otherwise you'll end up shaping them by hand and they'll look more like mushrooms then cupcakes.
4. Use candy coating if you want them to look like Bakerella's. I'm against it on principle, so I used semi-sweet chocolate for the bottoms and colored white chocolate for the tops, but they were both too thick to make a nice smooth thin coating, so my pops don't look like hers. For my first try, I decided I was okay with that.
5. If you get tired of dipping before all the balls are coated...you can just wrap them up and pop them in the freezer...they make great snacks for later :D

They were a hit at the shower and I hope you do try making them, especially if you have kids around. You can let them decorate these however they want and since it's straight out of a box, you'll get to the fun decorating part pretty quickly. Next time, I'm going to try the Hello Kitty ones. Aren't they adorable?

Cake Pop Closeup

Monday, June 22, 2009

Strawberry Love - Part 2


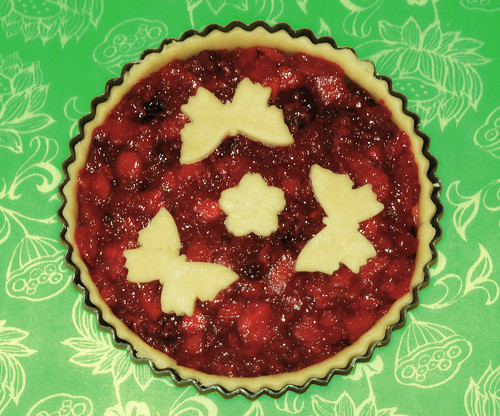
Just as promised, I'm writing about the rest of the strawberry creations I attempted this weekend. First up is this summery tart inspired by the recipe I found on one of my favorite blogs to stalk: Tartelette. I juggled the amount of fruit to add and snuck in a bunch of slices strawberries and then I shaped it like a tart instead of a galette, but it still came out quite good. I loved the tender crust which didn't get soggy and held it's own against the filling. Here is my recipe adapted from the one provided by Tartelette:

Pastry crust:
2 cups flour
2 tablespoons sugar
pinch of salt
1 stick butter, cut in small pieces
1 egg
2-4 tablespoons cold water

Combine flour, sugar, salt and butter in the bowl of a food processor and pulse until the butter is cut in, but not too fine. Add the egg and pulse just until it's evenly distributed. Dump the contents into a bowl and mix it into a smooth mass adding a bit of water to help as necessary. Wrap in plastic and put into fridge to rest while you make the filling.

Filling:
1 small apple; peeled, cored and diced
3 tablespoons lemon juice (about two lemons)
1 tablespoon sugar
1 tablespoon cornstarch
3 tablespoons water
1 pint sliced strawberries
1 pint blackberries, whole

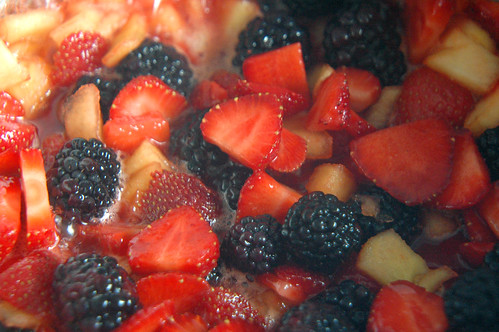
Combine chopped apple, lemon juice and sugar in a medium pot over medium heat and cook until the apples are tender. Add the blackberries and the strawberries and cook a few minutes. Meanwhile, combine water with the corn starch and mix into a smooth paste. Add this mix to the fruit and cook until it's thick and no longer foamy, only another minute or two. Remove from heat and cool.

Assembly:
Preheat oven to 350F.
Roll out the dough on a lightly floured surface to about a quarter inch thickness. You can either cut 6 inch circles and make galettes like Tartelette did or go the lazy route and transfer the dough into a tart pan with a removable bottom, trimming along the top. Fill the shell with the cooled filling and top with decorative accents cut from the leftover dough if you like. You can brush the edges with an egg and sprinkle with some sugar if you want to make it pretty, but I figured it was sweet enough, so I skipped this step.
Bake about 20 min until the crust is a light golden color and serve warm with a scoop of ice cream.


The next recipe comes straight from the fabulous FoodBlogga, so I won't copy it here. I will tell you that the only adjustment I made was to toss in a few extra strawberries and a few extra pecans into the mix. It was by far the favorite of all the things I made both at the Father's Day BBQ and the people who got to try some at work. I'll definitely be making more of this moist and fragrant cake and I highly recommend you click on the link above and make this cake soon. It tastes a LOT better than this picture looks :)


Finally, I was flipping through some back issues of Gourmet when I ran across this recipe for Strawberry Gelato. I had all the ingredients and my ice cream maker bowl was already in the freezer, so I went for it.

3/4 cup sugar
1 tablespoon cornstarch
1 cup whole milk
3/4 cup heavy whipping cream
2 1/4 cups sliced hulled strawberries
2 tablespoons pomegranate juice

Stir sugar and cornstarch in heavy medium saucepan (don't do this too vigorously or you'll end up wearing the cornstarch like I did). Whisk in milk and cream. Whisk over medium heat until the base thickens a little and begins to bubble, about 5 minutes. Pour into bowl and cool over ice, stirring occasionally.

Puree strawberries in processor. I strained the mix to get rid of as many clumps and seeds as I could and then added into the gelato base. Mix in pomegranate juice and chill the mixture, loosely covered in the fridge for about 3 hours or overnight. Process in ice cream maker according to manufacturer’s instructions. Transfer to container and freeze until firm, at least 3 hours and up to 2 days. Hoard or share as your conscience allows.

I tried to take a picture of the ice cream to share with you, but by the time I served it all and got back to the table, this is all I saw from everyones plates:


How's that for a raving endorsement?

Sunday, May 3, 2009

New Oven's First Days on the Job


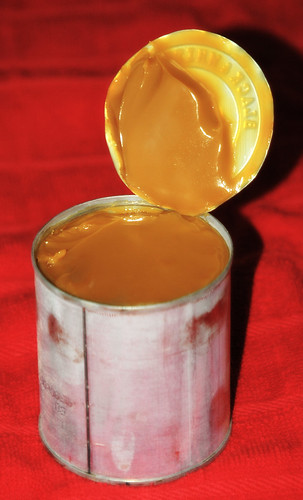
Sometime in the afternoon this past Friday my brand new oven came, along with a brand new (working) dishwasher. After the preliminary formalities were dispensed with (letting the oven run for an hour to clean the sealant and vent the chemical smells), I put it straight to work. Since I was still on the clock for my paying job, the most I could do was to get a head start on some Dulce de Leche that I'd be using later that day. It's the easiest thing in the world to make. You peel the label off of a can of condensed milk, put the can in a large pot and fill it with water so that the can is completely covered. Put the pot on the stove, bring to a boil and maintain a rapid boil for the next 2-3 hours depending on how firm you need the yummy spread to be. Don't forget to check on it every half hour or so and top off with boiling water as needed to keep the can submerged and be sure to allow the can to come to room temp on it's own once you're done. Don't plunge it in cold water or you might end up cleaning this stuff off from your kitchen ceiling. Should you have the patience to do this, you will end up with a can of golden creamy custard you can mix into frostings or eat with a spoon...or both :)

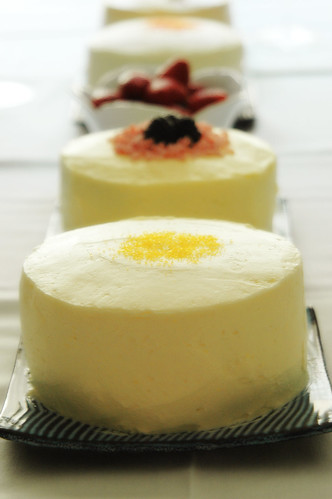
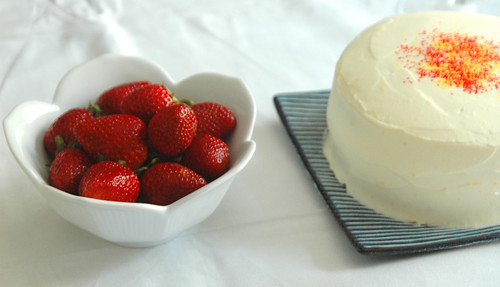
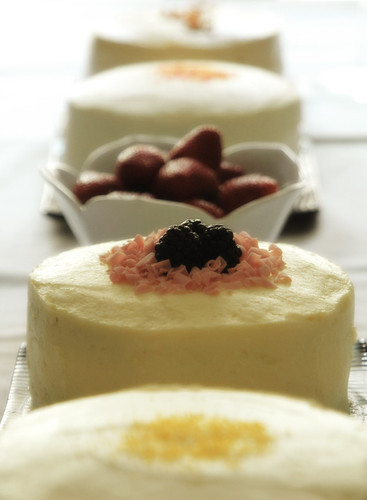
Once I finally wrapped everything up at work and walked into the kitchen, it was time to really roll up my sleeves. I whipped up a batch of Lemon Curd (my most favorite thing ever) using a variation of the recipe I pulled from an old Gourmet magazine, similar to this one and while that was cooling, I really got to work. You see, on Saturday I had some people coming over for a cake tasting. I've had this in my date book for months and the original plan was to spread the baking over a few days, but ofcourse no one could have predicted my oven breaking, so everything needed to be done that night. I had four cakes to make and only a few hours in which to make them. I cranked up some music, pulled out all the ingredients and got to work. In no time at all I had the lemon cake layers done. I later whipped some of the fresh lemon curd into Swiss Meringue Buttercream (SMB), sprinkled some yellow sugar on top so I'd know which one it was and you can see it in the picture below. The decorations on these were minimal due to a lack of time, but it was the flavors that were really important, so I wasn't too worried.


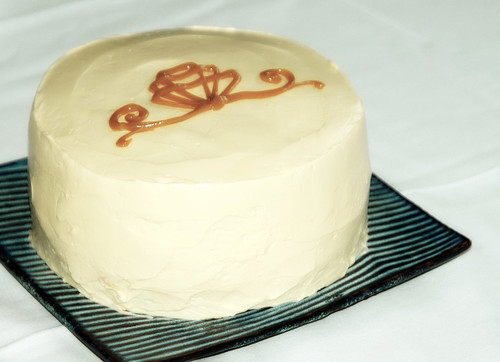
Then came the layers for the Parrot cake below. It's obviously not made of parrots, that would be morbid and cruel. It's a carrot cake where I replaced carrots with shredded pears. Doing this adds wonderful flavor and tons of moisture to the cake. Top that with honey and lemon spiked cream cheese frosting and it's definitely on my top 5 cakes list.


Next up was a new recipe for a White Chocolate cake, which I made some extra big layers of for my nephew's birthday cake on Sunday. These will later be filled with white chocolate ganache and fresh blackberries, then topped with the same lemon curd flavored SMB frosting I made for the lemon cake. I will make a few small adjustments to this recipe, but all in all it was very good:


And last but certainly not least was this Apple Spice cake topped with the by now cooled Dulce de Leche mixed into the SMB frosting. This one, I think would have been great without any frosting at all. In fact I made cupcakes from the leftover batter and if I don't take them to work tomorrow, I'll be tempted to finish them all off myself and ruin the non-existent diet that I'm supposed to be on.


Sometime around midnight I ran out of eggs. Woops. The last stores around me closed at midnight, so I changed out of my "cooking clothes" and took off in search of a 24 hour Jewel or Dominicks, which I luckily found and was back in my kitchen just a short hour later! Yikes, next time I'll need to really plan better! Finally, at the early hour of 4:30, having cleaned up as much as I had the strength to of the kitchen mess, I collapsed into bed and caught a few hours of sleep, picking things up again when I woke up a few hours later. The house cleaned (sort of), the table set, and the pictures taken, I was about to start making actual food to serve, when my friend called saying that she'd be arriving early...or would have if she hadn't gotten lost. After giving her some directions I gave up on attempting any more cooking. She was coming with her mom and her sister and they would be bringing sandwiches and bubbly, so if you really think about it, that and the cakes is more than enough for lunch. I think the tasting went well and we all had fun trying the different cakes and chatting. In the end they picked the white chocolate blackberry cake with the lemon frosting...and Katie, I wrote your decision in this blog, so you can't change your mind later!

Once they left, I loaded the dishwasher (I LOVE this thing! I have no idea how I got along without it all these years) and went to take a nap...which ended up lasting 4 hours. If you think baking was done for the weekend, you'd be wrong. I still had my nephew's birthday cake to finish. And not just any old cake, it had to be Curious George themed! I drove out to Target and WalMart, hoping I could just find some Curious George toys to put on top, but strangely there was nothing. He's adorable, why aren't there more toys with this cute monkey? I went back home empty handed and after scouring my pantry, I decided to just draw his face out of white and dark chocolate. I printed up a template, melted some chocolate and I think that considering that I haven't done this in years, it came out great! I filled and frosted the 2 tiered cake with a bright yellow frosting, topped it with the chocolate George and some festive sprinkles and was shocked to see that it was again the middle of the night, 3am. Time just runs away from me these days. Thank goodness I'm a night person.


I think the oven and I deserve a break. I promise not to bake anything for at least 24 hours....oh darn, I forgot to feed my friendship bread. I guess I'll go do that before turning in for the night. Sweet dreams :)

Sunday, April 26, 2009

Inter-office Cake War


This may not look like the best thing I've ever done, but it will taste amazing and totally serve it's purpose. A few days ago our office in Chicago got an email from our company's office in Vegas with a picture of a store bought (Dairy Queen) ice cream cake vaguely resembling our company logo with a subtitle of "Aren't you jealous Chicago?" Now this was entirely unnecessary. I bring baked goods to work all the time, as do a few of my other co-workers, and never have any of us tried to rub their noses in it, or at the very least not with something so...what's a nice word for ugly? I'm not being mean, I'm just quoting a coworker that after looking at the picture of their sad cake said "That's the ugliest heart I've ever seen". Our logo is a skewed target. I felt it was absolutely necessary to retaliate so I sent a reply email declaring war. Me against them and Dairy Queen. Hence this comely little cake. She's got three moist chocolate cake layers swirled with cheesecake, filled with a luscious toffee buttercream, and lovingly wrapped in decadent chocolate cheesecake frosting. And that's where my luck ran out. Summer has finally reached Chicago, and as the warmth permeated my small condo all my icing attempts absolutely refused to set. I finally gave up and did the best I could, hence the runny appearance of the writing. A few more days like this and I'll be forced to turn the air conditioning on. The look and feel of my cakes depend on it. For now I'll leave you with these words: "Victory shall STILL be mine!"

Sunday, March 15, 2009

They can't all be perfect


The day started out great. I slept in, I went out for brunch to a great place with a good friend and after walking around a bit in the rarely beautiful Chicago weather we came back to my house so that I can bake the second cake in the Star Wars series for the same birthday boy...and this is where the problems started. I had an idea for a cake. I was going to make one of the ships, don't ask me what they're called, so I whipped up a batch of earl gray chocolate cake, poured it into a pair of ball pans and the leftovers into some mini loaf pans and went to chat with my friend. I checked in on my cake a few minutes before I needed to take them out and I was greeted by something reminiscent of a crusty Jabba the Hutt. It seems that my trusty recipe backfired and tried to escape the pans. I decided to switch tactics and try something simpler for a design, so my friend and I started scouring the internet for more ideas. Finding nothing inspiring we took off for the nearest Michaels...then WalMart...then Jewel and finally back home without much of an idea of where to go next and a pair of small toys to use just in case all else failed. I started over and made a batch of chocolate pound cake from the Art & Soul of Baking, figuring that it can't hurt to leave this in the hands of a true professional. The cake came out very dense and chocolaty...so far so good, but it still needed to be decorated. At this point my friend had to go, seeing as how at this point we've already been at this for several hours, and I was on my own. The last resort option was a pair of crossing lightsabers, using the figurines to help the illusion that this was a credible solution to the problem, and I think it came out okay, but I think given slightly worse weather or slightly better luck, this could have been something great. Oh well, I guess Star Wars holds no sequels for me. Here's what came out of this whole ordeal:

Thursday, March 12, 2009

Attempt at Star Wars


First of all, I am not a Star Wars geek. I liked the "first" couple way back when, but I don't know everyone's names, I have only seen each of the movies twice, and I actually don't remember too much about any of them. This made fulfilling my latest order kind of difficult. They wanted a Star Wars cake and on a pretty short notice. I did some research and found some truly amazing cakes...that would all be either way too big or way too time consuming for my purposes. I also found some pretty messy ones and some that gave me good ideas. I combined two designs that I found and sketched it out. I'm getting better at this whole "planning" thing, normally I freehand it and something usually goes wrong. This time, the sketch came out great (I think) but I think I started getting tired by the time I got to the actual cake because I made some pretty obvious mistakes. For the most part though I think the little guy really does look like R2D2 and he's pretty cute. Yep, he's definitely growing on me.

Wednesday, January 28, 2009

Honey Cake Memories


My mom called me the other day to tell me about her search for the perfect honey cake recipe she remembers from her childhood and yet another failed attempt to recreate it. While I will thoroughly research every new baking/cooking endeavor and find the best recipes by learning from the mistakes of others, my mother is a lot more adventurous in the kitchen. On many occasions she has literally thrown whatever she felt like together with the carefree notion of "well, why not?" and "let's see what happens if I add this" and "well, if it doesn't turn out, your father will still eat it". And most of the time her experiments turn out great and she'll call me the next day and happily describe what she did with a touch of the old world instructions that don't actually have any measurements despite my best efforts to extract them. A snippet of the conversation will usually go like this:

Mom: "....and then you add some flour"
Me: "How much do you add?"
Mom: "Just a few handfuls 'till it starts looking like it's enough. You'll see."
Me: "Well, approximately how much did you add?"
Mom: "A few cups should do it. Oh, and then you need some baking soda and vinegar"
Me: "What? Really?"
Mom: "Of course, how else are you going to get it to fizz?"
Me: "It needs to fizz?"

And this is when I give up. None of the recipes I've ever come across even mention vinegar. I write down the ingredients she mentions on any scrap of paper I find along with my guesstimates of the measurements with a quick note stating that it's my mother's recipe and I file it away for future investigation.

But back to the honey cake. I wrote down the ingredients she was using and the two variations she learned from my grandmother and one of her friends and listened to how disappointed my father was when he had to go to sleep at the end of the night with no cake and the whole house smelling of baked goods and honey, and I decided to give it a try. I found a recipe that sounded the closest to what my mom was trying to do here and I decided to make it and bring it over to my parent's when I visit them tomorrow. Who knows? Maybe I can come close and I can give her the recipe to play with as she pleases. I doubled the recipe and made two small 8" loaves and a short 6" round cake. One loaf will come with me to work and the other I'll bring to my parent's house....as for that round one...aside from being my model it'll also probably be breakfast since it'll go great with the green tea I just bought. And in the mean time, I get to go to bed with my whole house smelling of warm honey with a touch of cinnamon.