Tuesday, August 16, 2011

Cookie Brownie Cupcake with Chocolate Marshmallow Frosting

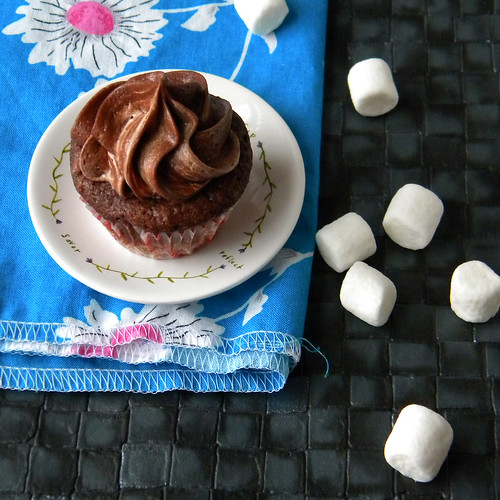
This is sort of a cheater post, but this cheat is genius! I've had so many crazy things going on, just one project on top of another (guess that's what happens when you procrastinate and then cram at the last minute), plus I'm going camping with my friend's family tomorrow, so the posts where I tell you about everything that's been going on and the awesome events I've attended will have to wait till next week, but I wanted to leave you with something super simple and super awesome:

Cookie Brownie Cupcake 3

I saw this weeks ago over on Confessions of a Cookbook Queen and the sheer awesome simplicity of it made me think "this must exist in my kitchen, and soon!"
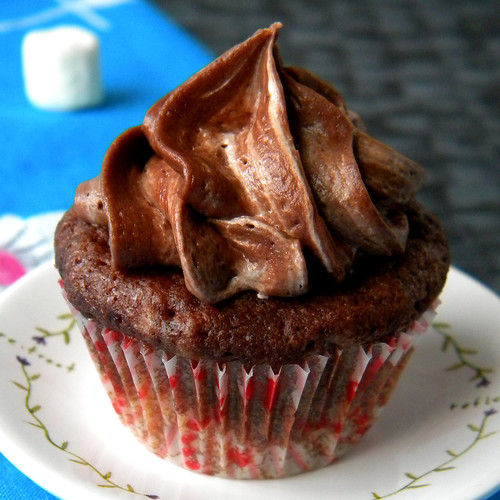
Cookie Brownie Cupcake

You can make your favorite brownie and/or chocolate chip cookie recipe to use in these, or you can be lazy and just use the boxed stuff from the store, I won't judge you, this summer has kept everyone super busy.
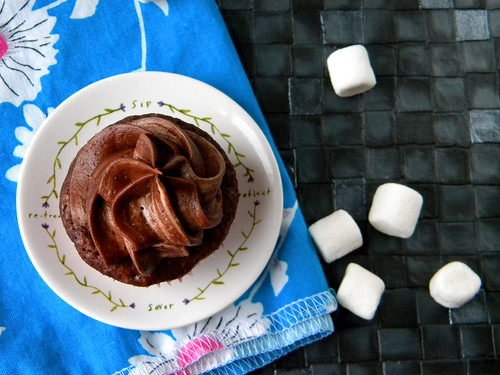
Cookie Brownie Cupcake 2

I made a dozen regular sized "cupcakes" and then I decided that it's a bit heavy so I used the remaining batter to make two dozen minis, which were the perfect "pop-6-in-your-mouth-before-you-know-what-you're-doing" size.

Cookie Brownie Cupcake 4

Cookie Brownie Cupcake with Chocolate Marshmallow Frosting
Adapted very slightly from Confessions of a Cookbook Queen. I basically gave mine an adult twist since I didn't have chocolate syrup :D

Ingredients
Your favorite brownie batter (homemade or use a mix)
Your favorite chocolate chip cookie dough (homemade or use a mix)

- Preheat oven to 350F and line you muffin tins with liners, either regular size or minis.
- Get your chocolate chip cookie dough and brownie batters ready.
- Scoop cookie dough into liners, a heaping tablespoon for regular size or a teaspoon for minis. Wrap a shot glass with saran wrap and use the bottom to flatten out the dough.
- Spoon brownie batter over the cookie dough, filling cups to about 2/3 full.
- Bake for about 20 minutes for the regular size or 15 for the minis. Basically keep an eye on the brownie part and take out when it's set. Remove from oven and cool on a cooking rack.

Frosting
2 sticks salted butter, softened
1 teaspoon vanilla
3 cups powdered sugar
1/4 cup cocoa powder
4 Tablespoons Baileys
7 oz jar marshmallow creme (or fluff)

- In the bowl of a mixer, beat butter, vanilla, and Baileys on medium-low speed until smooth and combined.
- Add powdered sugar and cocoa powder, stir a bit by hand (I just pull the beater blade off the mixer and use that instead of getting another utensil dirty), this keeps the dry stuff from flying out when you crank up the speed. Powdered sugar up your nose will not look good should an unexpected observer happen to walk by.
- Raise the speed on your mixer to high and beat for 2 minutes until light and fluffy.
- Using a spatula, fold in marshmallow creme, just until swirled throughout. You don’t want it to be completely mixed in.
- Pipe or frost on cookie brownies, then try not to shove too many into your mouth. Remember that lesson on sharing from grade school.

Sunday, August 14, 2011

Street Food Artistry 2011

I know it's seriously last minute, but if you guys are in the Chicago area today, come downtown for Street Food Artistry: an inaugural festival celebrating the tapestry of street food and art in Chicago. It's an event to support and spotlight cuisine from Chicago’s eclectic street food scene, anything from pop-up restaurants, street-inspired dishes, gourmet food trucks, to old school carts. All will be represented. Here's the info:

StreetFood Artistry 2011

I'm going to be down there for a few hours helping out, and I'll try to take lots of pictures to share with you afterwards, but if you can make it, there will be food and music and art and it's all for a great cause. Here's hoping it doesn't rain :D

Friday, August 12, 2011

Slow Roasted Garlic Tomatoes

Today's recipe almost sounds like a magic trick: Ladies and gentlemen, boys and girls! I have before you a dozen beautiful tomatoes and one tiny glass jar. Feel free to look at the jar, hold it in your hands, there are no trap doors or holes of any sort, and yet, before you leave today, each and every one of those tomatoes will fit neatly inside. Impossible you say? I say it's magic!

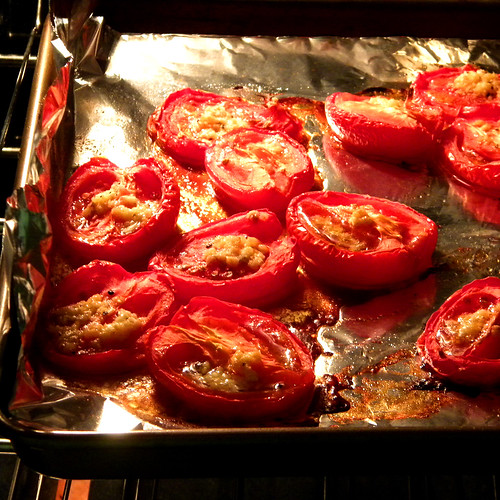
Slow Roasted Tomatoes 2

All it takes are the most beautiful tomatoes, a few cloves of garlic, a healthy glug of olive oil and some salt and pepper. Oh yes, and a bit of patience. Follow the steps, and you'll be rewarded with a jar of concentrated tomato gold where each bite makes you think of an entire tomato plant warming in the sun.

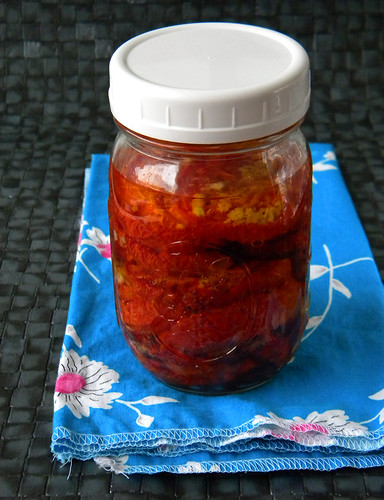
Slow Roasted Tomatoes in Jar

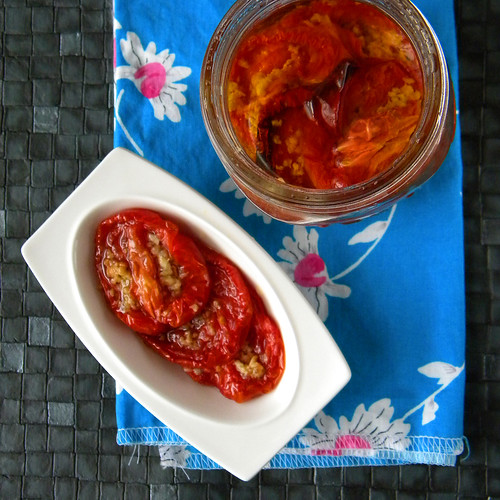
Serve them up on little pieces of toast over a smear of goat cheese, chop them up into pasta, toss them onto a homemade pizza, or sneak them straight out of the jar, they'll be awesome either way.

Slow Roasted Tomatoes 4

Oven Roasted Garlic Tomatoes

12 (or as many as you have) fully ripe tomatoes, I used plum
8-10 cloves of garlic, smashed to smithereens
1/4 + 1 Tbsp cup good olive oil
salt and pepper

- Preheat the oven to 325F
- Line a rimmed cookie sheet with wax paper or a Silpat and very lightly brush with 1 Tbsp of olive oil.
- Cut each of your tomatoes in half, remove the green core, and using a small spoon remove the seeds. (I dumped them all into a bowl, stirred in a bit of salt and balsamic and ate it with a spoon. Don't judge me.) Lay out the halves open side up on your sheet.
- In a small bowl combine mashed garlic, salt and pepper, and the olive oil. Spoon a bit of this mixture into each tomato half until all are filled.
- Slide the tray into the oven and let the tomatoes relax and shrink for about an hour. They should look a tiny bit flatter then those in the picture above, you don't want to completely dry them out.
- You can use these straight out of the oven, or carefully slide the flat halves into a jar, top off with a bit more olive oil so that they're submerged, and store in the fridge until needed. As a bonus, once the tomatoes are all gone, you still have the amazingly infused olive oil in the jar to use on bruschetta or pasta. Yum!

Tuesday, August 9, 2011

Roasted Red Pepper or Spicy Hummus

For the last two weekends I've had to work on Friday nights and on Saturdays. While this isn't too bad since it doesn't happen all the time, combined with everything else that's been going on, me turning the dreaded 30, and the fact that I haven't had a full weekend to recover has left me constantly sleepy. Old fogies like me need naps, not to mention that it's hard to gather any sort of enthusiasm for anything in the sweltering heat of summer that we've had these past few weeks.

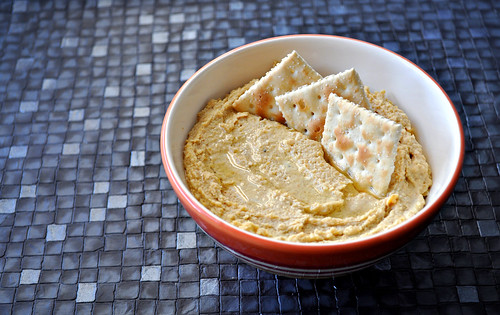
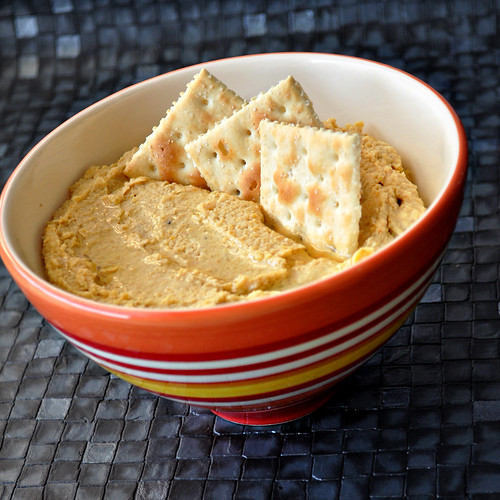
Hummus

As a result, I've had no interest in cooking. Or even going grocery shopping for that matter. Once the produce from my last trip out dwindled, I was left with the contents of my randomly stocked pantry and a rather lonely couple of red peppers in the fridge. So for half of last week, this hummus has been my dinner and my lunch...and honestly, I'm not complaining, this stuff is addictive!

Hummus Square

Spicy Hummus
Adapted slightly from Always With Butter

1 can chickpeas
1/4 cup tahini, well stirred
1 tsp sea salt
1/2 tsp garlic powder
1/4 tsp cayenne pepper
1 tsp cumin
2 tsp lemon juice
1 tsp olive oil
1 Tbsp water

Dump everything into a food processor and whir into oblivion. Add a bit more oil or a tablespoon of water if you want it smoother/thinner. Plop in front of the TV with the food processor bowl and a bag of crackers and enjoy your one bowl dinner which didn't require you to turn on the oven or fry something.

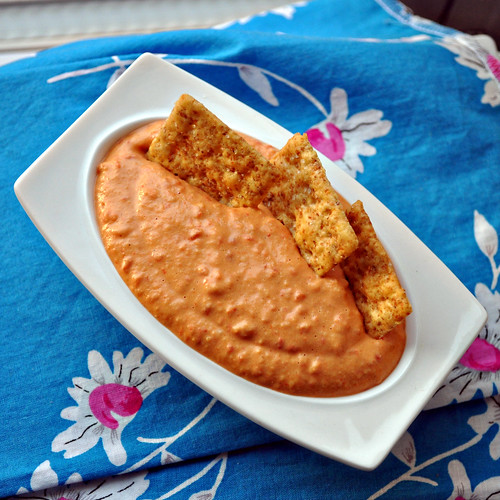
Red Pepper Hummus

Roasted Red Pepper Hummus

1 batch Spicy Hummus from above
1 red bell pepper
1/2 tsp olive oil

- Use your hands to rub the olive oil all over the red pepper, turn your oven to broil and slide a shallow dish with your pepper in it right under the flame.
- Use tongs to turn your pepper every 5 minutes until you have a nice blistery char all over the surface of the pepper.
- Place the pepper into a small bowl, cover tightly with saran wrap and let it cool for 10-15 minutes. This should loosen the skin allowing you to easily peel it right off. Pull out the stem and the seeds from the inside and dump the pepper flesh along with any juices into your food processor where the spicy hummus is waiting. Pulse a few times until the pepper is nicely blended in and enjoy.

Note: Since you're already going to all this work for the pepper, I'd recommend making two or three at a time. Whatever you don't put into your hummus would be an amazing addition to any sandwich you choose to make for lunch.

Thursday, August 4, 2011

Fried Green Tomatoes

I've only ever had fried green tomatoes once before. Last summer a couple of friends and I picked up a couple of heirloom green tomatoes at a small market, brought them home and my friend fried them up. They were amazing. We sat around the table pulling slices out of the stack and oohing and aahing. They were so good.

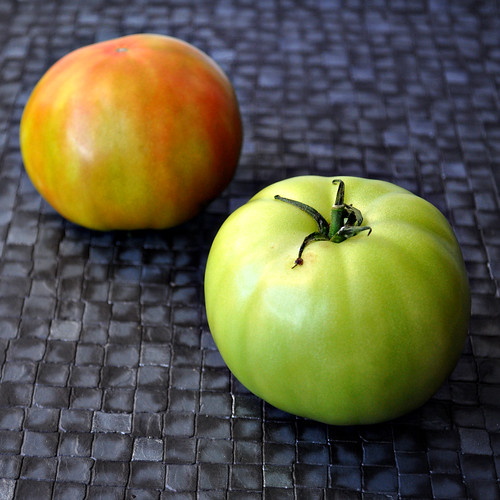
Green Tomatoes

As tomato season slowly reaches the height of it's season, I'm seeing more and more varieties at the market and this past weekend I saw these. They're not exactly heirloom, but no food at home and no other dinner plans in sight, I decided to try making a batch of fried green tomatoes myself.

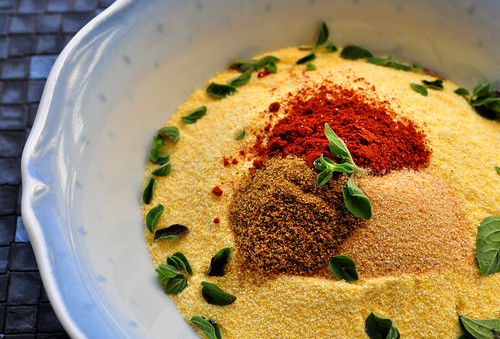
Fried Green Tomato Spices

I found a basic recipe over at Epicurious and added a bunch of spices, because it sounded a bit bland.

Fried Green Tomatoes

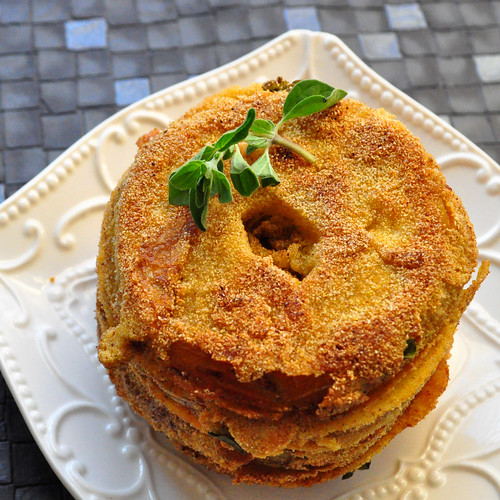
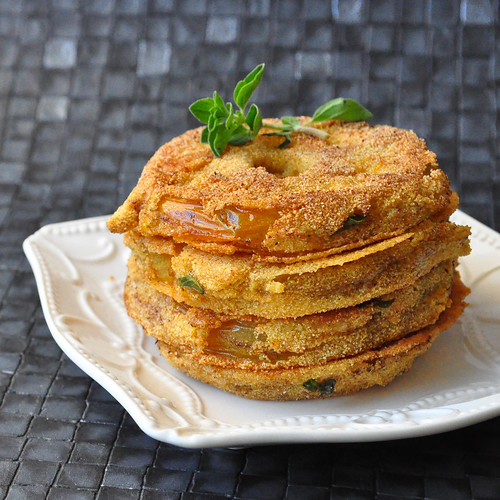
They came out even better then I remembered. The tomatoes themselves had an almost lemony flavor, and the mild heat of the spicy crust complimented that nicely. I dashed a bit of sriracha on top and dinner was served.

Fried Green Tomatoes 2

Fried Green Tomatoes
Adapted from a recipe found on Epicurious

2 large, firm green tomatoes, cut crosswise into 1/4-inch slices
Kosher salt and freshly ground black pepper to taste
1/2 cup finely ground cornmeal
1/2 teaspoon paprika
1 teaspoon garlic powder
1/2 teaspoon cayenne pepper
1/2 teaspoon finely chopped oregano
2 eggs
Vegetable oil
Sriracha to serve, optional

1. Sprinkle the tomato slices with the salt and pepper; set aside.
2. Combine the cornmeal, paprika, garlic powder, cayenne, and oregano in a shallow bowl. In another bowl, beat the eggs.
3. Cover the bottom of a heavy skillet with 1/2 inch of oil, then place it over medium-high heat.
4. Coat the tomato slices in the egg, then dredge them in the cornmeal mixture.
5. Fry as many tomatoes as fit comfortably in the pan until nicely browned, about 2 minutes a side.
6. Transfer them to a paper towel-lined platter. Repeat until all the tomatoes are cooked.
7. Drizzle a bit of sriracha over the top if you want some extra heat and enjoy!

Tuesday, August 2, 2011

She Deviled Eggs

A few weeks ago I found a gorgeous photo of a recipe that sounded really good on Saveur, so I tweaked a few things, baked some beets and made a big jar of these beautiful pickled beets. Unfortunately, it turns out that I'm not a huge fan of apple cider. Oh how I wish I had known that before I submerged a half dozen gorgeous baked beets into it. It's not bad with a slick of balsamic though, and I'm not one to waste anything, so I've been tossing it into salads, beet by beet.

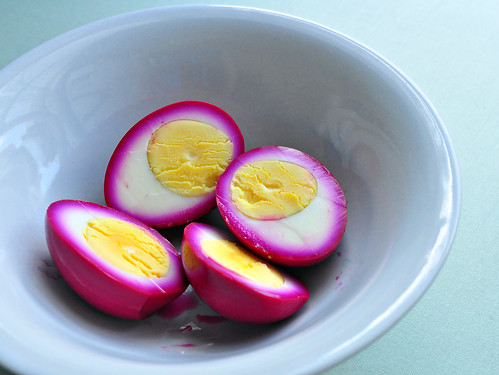
Pink Hardboiled Eggs

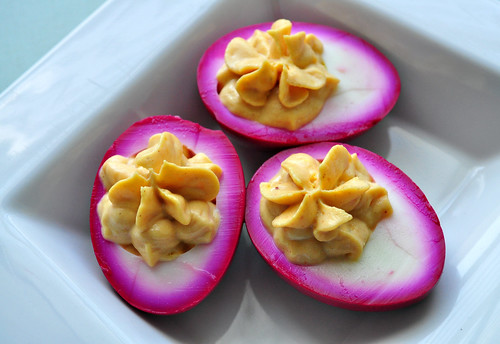
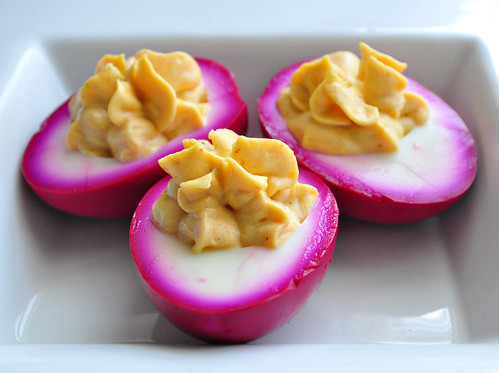
But here's where I convince you to make that not so stellar recipe: it makes the most beautiful deviled eggs! They're like the every day picnic in the park variety, but with lipstick and an evening gown on. Gorgeous little she devils.

She Devilled Eggs

I marinated the eggs overnight and while the recipe does say that you can keep them in there up to 5 days, I would say don't overdo it. The vinegar does make the whites a bit rubbery, so you just want them to absorb the color and a touch of the vinegar flavor, then fish them out. The rest is up to you. Use your favorite deviled egg recipe or use the one I've listed below. I promise, a plate of these is sure to dress up any buffet table.

She Devilled Eggs 2

She Deviled Eggs

6 eggs, marinated overnight in pickled beet juice, store bought or homemade
1 heaping teaspoon of Dijon mustard
3 Tablespoons mayo
1/2 teaspoon garlic powder
1/4 teaspoon paprika
dash of tabasco
salt and pepper to taste

- Hard boil the eggs, allow to cool slightly and peel. Drop into the beet brine and leave in fridge for a few hours or overnight.
- Fish out the eggs and lightly pat dry with a paper towel. I didn't and I had little pink spots everywhere. Cut in half and pop the yolks into a bowl. Set the pretty pink egg white halves aside.
- Add the remaining ingredients to the bowl of yolks and mash everything together with a fork.
- Scoop the mixture into the pink egg white halves or pipe it in and serve!