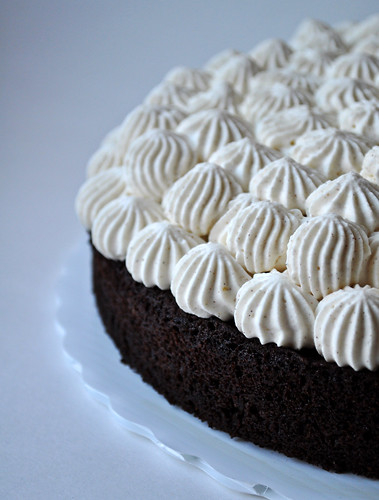
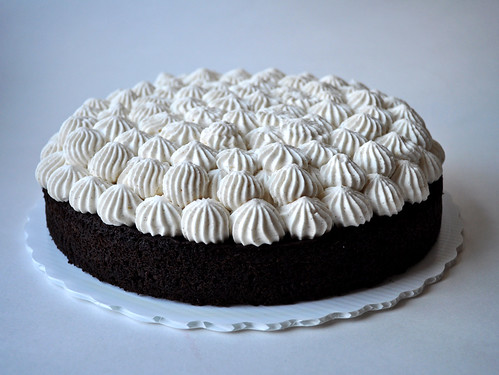
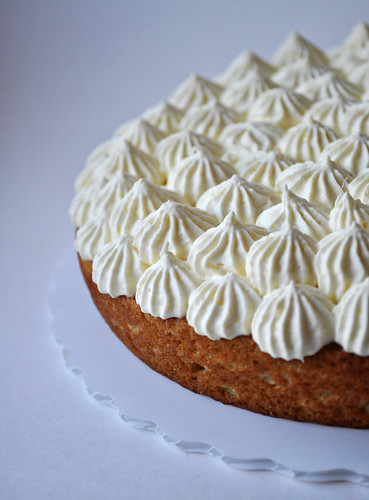
Did you know that there was a way to make whipped cream frosting more stable? It's always been my favorite thing to top a cake with, but for a long time I'd shied away because if you let it sit overnight, sometimes it would separate and weep or perform some other underhanded trick that would turn a beautiful cake into something a bit melty and sad, like a snowman at the end of winter. So I'm going to share what I learned with you as well as give you two really moist and really yummy egg-less cakes to try it out on. Why egg-less? I had made these for a co-worker's birthday, which fell on a day when she doesn't eat eggs. Oh...and I didn't have eggs, so there you go.
I'm pretty sure you guys don't need a recipe for whipped cream, but I'm going to tell you what I did anyways. For each cake I made I put 1.5 cup of cold whipped cream, 1/4 cup of powdered sugar, and a dash of spices (cinnamon for chocolate and cardamom for mango) into the bowl of my kitchenaid. In a small bowl I poured about a tablespoon and a half of water and sprinkled 2 teaspoons unflavored gelatin over it. Give it a minute to absorb and then nuke in the microwave for about 20-30 seconds. Keep an eye on it because it will foam up. Start whipping the cream and when it starts to thicken, turn down the speed to low and pour in the melted gelatin. Keep whipping until stiff peaks form, but don't overwhip or you'll start making butter. That's it! Just a few extra steps to your regular process and you can pipe it into pretty shapes and keep in the fridge overnight without worrying that it'll all break down into a wet soppy delicious mess.
Egg-less Chocolate Cake
Adapted from Sharmis Passions
Dry Ingredients:
- 1 and 1/2 cups (225 grams) flour
- 4 Tbsp cocoa powder
- 3/4 tsp baking soda
- 1/4 tsp baking powder
- 1/4 tsp salt
- 3/4 cup (200 grams) sugar
Wet Ingredients:
- 1 cup (250 ml) brewed coffee, room temp
- 1/2 tsp vanilla extract
- 1 Tbsp lemon juice
- 1/4 cup (60 ml) vegetable oil
Optional:
- 1/2 cup mini chocolate chips
1. Preheat the oven to 350F.
2. Grease and flour a 9 inch round cake pan.
3. Sift together all of the dry ingredients in a large bowl.
4. Whisk together all of the wet ingredients, pour into the dry and gently fold until combined along with half of the chocolate chips.
5. Pour batter into prepared pan and sprinkle the remaining chocolate chips over the top.
6. Bake it at 350F for 35-40 mins or until a toothpick comes out clean. Cool completely before turning out onto a plate. It will fall apart if you try to take it out while it's still hot. It will still be delicious, though not as pretty.
7. Serve slices as is or top with sweetened whipped cream spiked with a dash of cinnamon.
Egg-less Mango Cake
Adapted from Lite Bite
- 1.5 cup flour
- 2 great big ripe mangoes
- 1/2 cup sugar (add a bit more if your mangoes aren't very sweet)
- 1/4 cup yogurt, plain or mango flavored
- 2 Tbsp olive oil
- 1/2 tsp baking soda
- 1 tsp baking powder
- A pinch of salt
- 1/2 tsp ground cardamom
1. Preheat the oven to 350F.
2. Grease and flour a 9 inch round cake pan.
3. Peel and puree the mangoes.
4. Sift together the flour, salt, baking soda and baking powder in a large bowl.
5. Add the fruit puree, yogurt, olive oil, cardamom powder and sugar and fold in until combined.
6. Pour batter into the prepared pan and bake at 350F for 30-35 minutes or until a toothpick comes out clean. Same as with the chocolate cake, let it cool completely before turning out onto a plate or it might fall apart.
7. Serve slices as is or top with sweetened whipped cream spiked with a dash of cardammom or mango puree.
Monday, January 30, 2012
Thursday, January 19, 2012
Green Tea Honey Cake
January is well underway, and I'd like to give myself a little pat on the back. I haven't moved any mountains, but I'm still on the slow and steady path to checking things off of my todo list. I've wrapped up a handful of craft projects (and only started one new one), I'm still slowly making my way through the house cleaning/organizing as I go, and I've been good about adding tasks to my todo list as I find new things that need doing. How are you guys doing so far?
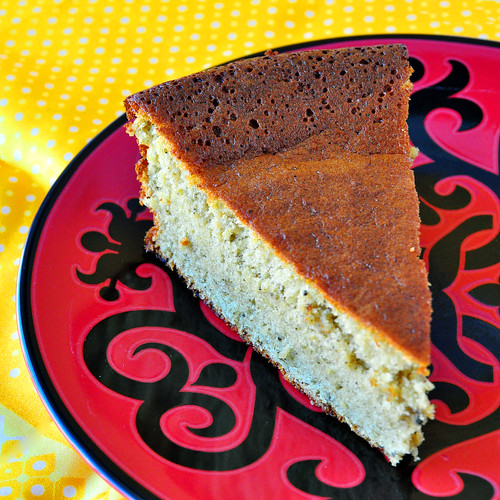
This past weekend I decided to tackle, or at least start to tackle, my pile of magazines, saved recipe pages, and stacks of binders full of recipes. I got as far as going through the binders and cleaning out all the recipes I'd tried and not been crazy about as well as some that I have no idea why I saved them in the first place. But as I was flipping the pages and moving things around I ran into a recipe I had saved almost a decade ago for a Green Tea Honey Cake. The recipe was from Cooking Light and was submitted by Ling Fong, then a culinary student, and it looked perfect. It had more eggs then I'm normally comfortable with, but there was no other fat and they say eggs are good for you, right? So I stopped sorting, stepped into the kitchen and made it. It came out great. I was light and fluffy, not too sweet and with a nice matcha flavor that showed through. Perfect accompaniment to a cup of tea or coffee.
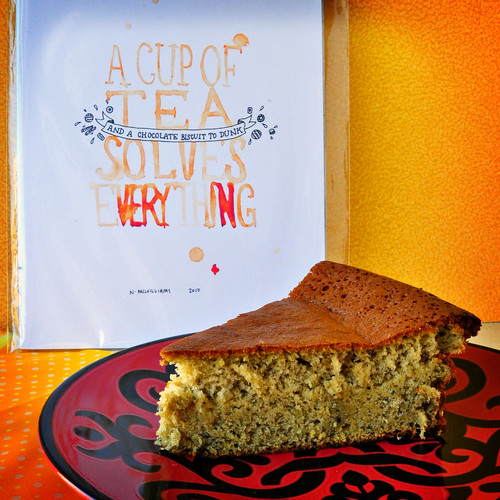
Green Tea Honey Cake
by Ling Fong via Cooking Light, Mar '02
I added some process notes that might help you. I did a quick search and learned that quite a few people had problems with this recipe, but since it turned out for me I wanted to include the extra little things I noticed as I went.
- 2/3 cup sugar
- 4 large eggs
- 4 large egg yolks
- 1/3 cup milk (fat-free is fine)
- 1/4 cup honey
- 1 cup all-purpose flour
- 1 tablespoons matcha powder or 2 Tbsp ground up green tea
1. Preheat oven to 350°.
2. Coat a 9-inch round cake pan with cooking spray; line bottom of pan with wax paper. Coat wax paper with cooking spray; set aside.
3. Place sugar, eggs, and yolks in a large bowl and whip with a mixer at medium speed until thick and pale (about 6 minutes). Don't skimp on this, if the batter isn't beaten properly the cake will turn out flat.
4. Whip milk and honey into the egg mixture, beating for a few seconds to fully incorporate.
5. Lightly spoon flour into a dry measuring cup; level with a knife. Place flour in a small mixing bowl; add tea, stirring well with a whisk. Fold flour mixture into egg mixture, making sure to dig all the way to the bottom and incorporate the flour evenly, but don't beat out all the air that you spent all that time whipping in. Pour batter into prepared pan. It will fill the pan almost completely, but that's okay since there are no leavening agents and it won't rise too much.
6. Bake at 350° for 40 minutes or until a wooden pick inserted in center comes out clean. The original time stated 30 minutes, but it took a full 10 minutes extra for me, and my oven normally runs a bit hot so check your cake at 30 min and don't worry if it takes longer. You will see quite a bit of color on top, but don't worry, that'll turn out delicious as long as it's cooked all the way through inside. Cool in pan 10 minutes on a wire rack. Remove from pan and cool completely. Enjoy!

This past weekend I decided to tackle, or at least start to tackle, my pile of magazines, saved recipe pages, and stacks of binders full of recipes. I got as far as going through the binders and cleaning out all the recipes I'd tried and not been crazy about as well as some that I have no idea why I saved them in the first place. But as I was flipping the pages and moving things around I ran into a recipe I had saved almost a decade ago for a Green Tea Honey Cake. The recipe was from Cooking Light and was submitted by Ling Fong, then a culinary student, and it looked perfect. It had more eggs then I'm normally comfortable with, but there was no other fat and they say eggs are good for you, right? So I stopped sorting, stepped into the kitchen and made it. It came out great. I was light and fluffy, not too sweet and with a nice matcha flavor that showed through. Perfect accompaniment to a cup of tea or coffee.

Green Tea Honey Cake
by Ling Fong via Cooking Light, Mar '02
I added some process notes that might help you. I did a quick search and learned that quite a few people had problems with this recipe, but since it turned out for me I wanted to include the extra little things I noticed as I went.
- 2/3 cup sugar
- 4 large eggs
- 4 large egg yolks
- 1/3 cup milk (fat-free is fine)
- 1/4 cup honey
- 1 cup all-purpose flour
- 1 tablespoons matcha powder or 2 Tbsp ground up green tea
1. Preheat oven to 350°.
2. Coat a 9-inch round cake pan with cooking spray; line bottom of pan with wax paper. Coat wax paper with cooking spray; set aside.
3. Place sugar, eggs, and yolks in a large bowl and whip with a mixer at medium speed until thick and pale (about 6 minutes). Don't skimp on this, if the batter isn't beaten properly the cake will turn out flat.
4. Whip milk and honey into the egg mixture, beating for a few seconds to fully incorporate.
5. Lightly spoon flour into a dry measuring cup; level with a knife. Place flour in a small mixing bowl; add tea, stirring well with a whisk. Fold flour mixture into egg mixture, making sure to dig all the way to the bottom and incorporate the flour evenly, but don't beat out all the air that you spent all that time whipping in. Pour batter into prepared pan. It will fill the pan almost completely, but that's okay since there are no leavening agents and it won't rise too much.
6. Bake at 350° for 40 minutes or until a wooden pick inserted in center comes out clean. The original time stated 30 minutes, but it took a full 10 minutes extra for me, and my oven normally runs a bit hot so check your cake at 30 min and don't worry if it takes longer. You will see quite a bit of color on top, but don't worry, that'll turn out delicious as long as it's cooked all the way through inside. Cool in pan 10 minutes on a wire rack. Remove from pan and cool completely. Enjoy!
Tuesday, January 10, 2012
A Toast to the New Year - Nocino
Hi there! I hope you all had a most wonderful holiday season and got everything you wanted under your tree. I know that I'm ridiculously behind with this post, but for the last two weeks I've been in serious cleaning mode. It's not exactly a resolution as much as clearing the path so that I can see the floor and maybe make time to make a resolution. Now that the dining room table is sporting just the centerpiece, now that the stacks of boxes/bags/magazines have been cleared from the living room, now that jars/boxes/pots/pans/cookie sheets have been put away in the kitchen and the piles of clothes washed and put away in the bedroom, now I can look around and start thinking about new projects.
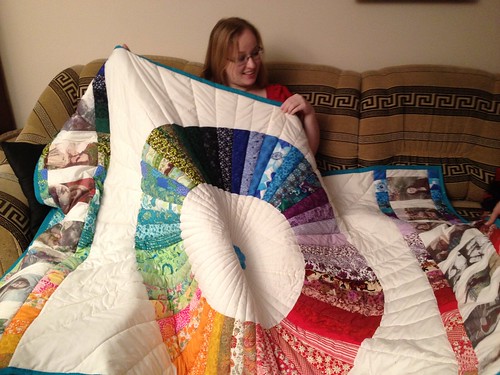
I had finished and gifted the quilt I had started for my mom way back in March. It was one of my biggest projects this year and supposed to have been a Mother's day gift, but instead turned into a gift for New Years. I got the design from Last-Minute Patchwork + Quilted Gifts, extending it on each side with the colors used in the wheel and adding family photos printed on fabric. Considering it was my first quilt, I'm rather proud...just don't look to closely at the quilting on the back!
I had also gotten around to bottling and giving out as gifts the Green Walnut Wine and the Nocino I had told you all about back in July. Both came out wonderfully, but I think the next time I make these - and believe me I'll definitely be making these again - I'm going to reduce the amount of sugar and get better coffee filters. The cheap ones kept tearing and I went through almost half the box trying to make sure that the liquor ended up clear and clean.
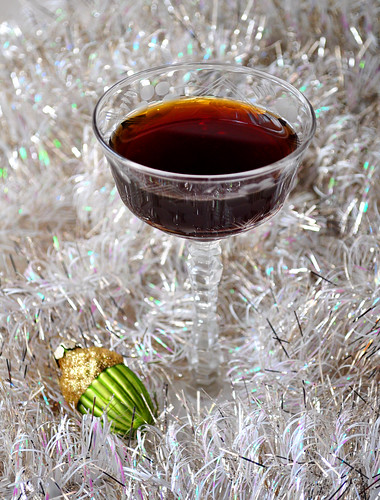
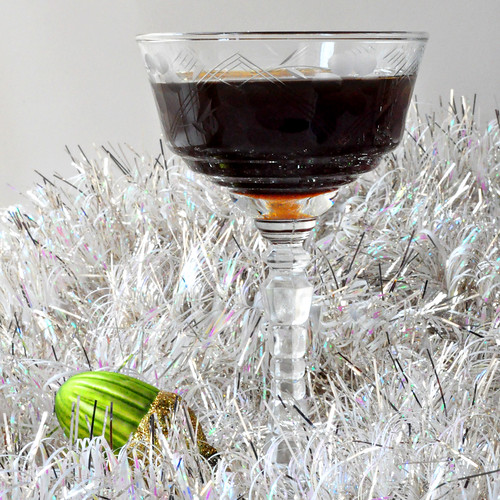
The wine had almost a port-like thickness to it with a nice spicy warmth and the elusive certain something that the walnuts added, but the Nocino was by far my favorite. It has the citrus notes from the lemon and orange peel in the background, the warmth from the cinnamon and vanilla, but none of these overpowered the actual walnut. When I was little there used to be a dozen walnut trees in our back yard. We lived in an apartment complex so the trees didn't really belong to anyone and as kids we used to climb the trees and eat the walnuts before they were quite ripe, and this liquor reminded me very strongly of those summers of scraped knees and endlessly torn/stained dresses. I let one of my friends smell the jar before it was ready and she proclaimed that even if it doesn't end up tasting good, it can be bottled as cologne because it smelled amazing. I'm glad to say that a small glass, chilled, makes for a wonderful aperitif.
Now I know that June and walnut season seem like a lifetime away, but there's nothing better then enjoying a taste of summer in the winter and planning for the summer ahead.
Nocino Recipe
Adapted from Simply Recipes, I doubled the recipe, reduced the sugar a bit, added some personal twists, and incorporated ideas found in other recipes across the web.
Walnut juice will permanently stain anything it touches a deep brown, so you definitely want to wear gloves while cutting them and be sure to wash the cutting board with soap as soon as you are done.
75 green walnuts, you want them while they're still soft and easily cut with a knife
4 cinnamon sticks
2 whole cloves (I don't like cloves so I reduced the amount, next time I might leave them out completely)
1 whole vanilla bean, split in half lengthwise
Zest of one lemon, make sure to leave out the white pith
Zest of one orange, leave out the pith here as well
16 walnut leaves, optional
4 cups granulated sugar
2 liters vodka or everclear
Great big glass jar
1. Rinse and pat dry the walnuts. Carefully cut them into quarters with a sharp knife making sure that none of the walnuts have started forming a hard shell yet. I wasn't sure what adverse affects the late walnuts would cause, so I tossed the two I had encountered in my batch. One site recommended sticking a needle through each walnut prior to cutting to ensure that it was good.
2. Put walnuts, spices, zest, leaves, and vodka into a large glass container making sure that the vodka covers the walnuts. Cover and shake or stir to mix well. Store for at least 6 weeks, giving it a shake every couple of days or so. I read somewhere, and I really wish I could remember where, that the jar should be kept in a nice shaded area outside, and I liked the whimsy of it so I kept it on my kitchen windowsill (my apartment has no back yard/porch or balcony so it's as close as I was going to get). This had the benefit of me actually remembering to shake it once in a while.
3. After 6 weeks (or two months in my case) remove the walnuts and solids with a slotted metal spoon, again being careful as this mixture will still stain. Strain the liquid through several layers of cheesecloth and then through a coffee filter back into into the rinsed jar to get rid of any debris or sediment, and add the sugar. Shake well and leave for another month or so, again shaking every couple of days.
4. Once you're ready to bottle, just siphon into bottles and cork tightly. Like most liquors it should last several years stored in a cool, dry place and will soften and mellow out with age. Keep a bottle or two in the back of the cabinet and try it every couple of months to see what you like best. I poured myself a taste a month after bottling and it was quite good. I ended up with almost 10 half-bottles (375mL) in the end.
I had finished and gifted the quilt I had started for my mom way back in March. It was one of my biggest projects this year and supposed to have been a Mother's day gift, but instead turned into a gift for New Years. I got the design from Last-Minute Patchwork + Quilted Gifts, extending it on each side with the colors used in the wheel and adding family photos printed on fabric. Considering it was my first quilt, I'm rather proud...just don't look to closely at the quilting on the back!

I had also gotten around to bottling and giving out as gifts the Green Walnut Wine and the Nocino I had told you all about back in July. Both came out wonderfully, but I think the next time I make these - and believe me I'll definitely be making these again - I'm going to reduce the amount of sugar and get better coffee filters. The cheap ones kept tearing and I went through almost half the box trying to make sure that the liquor ended up clear and clean.
The wine had almost a port-like thickness to it with a nice spicy warmth and the elusive certain something that the walnuts added, but the Nocino was by far my favorite. It has the citrus notes from the lemon and orange peel in the background, the warmth from the cinnamon and vanilla, but none of these overpowered the actual walnut. When I was little there used to be a dozen walnut trees in our back yard. We lived in an apartment complex so the trees didn't really belong to anyone and as kids we used to climb the trees and eat the walnuts before they were quite ripe, and this liquor reminded me very strongly of those summers of scraped knees and endlessly torn/stained dresses. I let one of my friends smell the jar before it was ready and she proclaimed that even if it doesn't end up tasting good, it can be bottled as cologne because it smelled amazing. I'm glad to say that a small glass, chilled, makes for a wonderful aperitif.
Now I know that June and walnut season seem like a lifetime away, but there's nothing better then enjoying a taste of summer in the winter and planning for the summer ahead.

Nocino Recipe
Adapted from Simply Recipes, I doubled the recipe, reduced the sugar a bit, added some personal twists, and incorporated ideas found in other recipes across the web.
Walnut juice will permanently stain anything it touches a deep brown, so you definitely want to wear gloves while cutting them and be sure to wash the cutting board with soap as soon as you are done.
75 green walnuts, you want them while they're still soft and easily cut with a knife
4 cinnamon sticks
2 whole cloves (I don't like cloves so I reduced the amount, next time I might leave them out completely)
1 whole vanilla bean, split in half lengthwise
Zest of one lemon, make sure to leave out the white pith
Zest of one orange, leave out the pith here as well
16 walnut leaves, optional
4 cups granulated sugar
2 liters vodka or everclear
Great big glass jar
1. Rinse and pat dry the walnuts. Carefully cut them into quarters with a sharp knife making sure that none of the walnuts have started forming a hard shell yet. I wasn't sure what adverse affects the late walnuts would cause, so I tossed the two I had encountered in my batch. One site recommended sticking a needle through each walnut prior to cutting to ensure that it was good.
2. Put walnuts, spices, zest, leaves, and vodka into a large glass container making sure that the vodka covers the walnuts. Cover and shake or stir to mix well. Store for at least 6 weeks, giving it a shake every couple of days or so. I read somewhere, and I really wish I could remember where, that the jar should be kept in a nice shaded area outside, and I liked the whimsy of it so I kept it on my kitchen windowsill (my apartment has no back yard/porch or balcony so it's as close as I was going to get). This had the benefit of me actually remembering to shake it once in a while.
3. After 6 weeks (or two months in my case) remove the walnuts and solids with a slotted metal spoon, again being careful as this mixture will still stain. Strain the liquid through several layers of cheesecloth and then through a coffee filter back into into the rinsed jar to get rid of any debris or sediment, and add the sugar. Shake well and leave for another month or so, again shaking every couple of days.
4. Once you're ready to bottle, just siphon into bottles and cork tightly. Like most liquors it should last several years stored in a cool, dry place and will soften and mellow out with age. Keep a bottle or two in the back of the cabinet and try it every couple of months to see what you like best. I poured myself a taste a month after bottling and it was quite good. I ended up with almost 10 half-bottles (375mL) in the end.
Subscribe to:
Comments (Atom)

