Showing posts with label tarts. Show all posts

Monday, August 9, 2010

Apricot Almond Tart

Ever since I picked up two pints of the sweet rosy apricots at the farmer's market, I've been scheming about making them into a tart. For two days their future looked dubious, as I kept sneaking one after another from the fridge and eating them. Apricots are one of those fruit that are really only worth eating during their natural season. The stuff you find on the store shelf in the winter time has absolutely no flavor and quite frankly shouldn't even be called an apricot. But these reminded me of when I was little and climbed trees and tasted apricots every day, starting when they were green and right up to the point when they were juicy beyond belief. I'd bring the haul home to my mom using my dress as an apron and after reprimanding me for ruining yet another outfit, my mom would bake. Sometimes they'd get made into a summer fruit punch, but it was always something incredibly delicious and I was quite willing to ruin a dress or two to get the treats.

Apricot Tart 2

My sister was throwing an impromptu dinner party for a few friends and I decided that an apricot tart would be the perfect accompaniment for her cheese platter. Once I saw the pictures of the tart over at
Annie's Eats, my mind was made up and I headed into the kitchen.

This is a very straight forward recipe that comes together very quickly and easily. I decided to quarter the apricots and fan them out in the crust, but then all my hard work got covered up by the almond creme, so I think next time I'll leave them as halves like Annie did. Either way, it was delicious and will definitely be made again.

Apricot Tart


Apricot Almond Tart
via Annie's Eats
Note: Per Annie's suggestion, I also added a tablespoon of sugar to the crust and I think it came out perfectly.


For the crust:
5 tbsp. unsalted butter, at room temperature
3 egg yolks
1 tbsp. sugar
Pinch of salt
1 1/2 cups all-purpose flour
2-4 tbsp. ice water, if needed

For the filling:
8 tbsp. unsalted butter, softened
1/3 cup honey
1 cup ground almonds (blanched or slivered)
2 large eggs
1/4 cup heavy cream
8-10 apricots, halved and pitted

To make the crust, in the bowl of a mixer, beat the butter on medium-high speed until light and fluffy. Mix in the egg yolks one at a time, beating well after each addition. Blend in the sugar and salt. Mix in the flour just until incorporated. Add ice water 1 tablespoon at a time, beating on low speed, just until the dough comes together. Form the dough into a disk, wrap tightly in plastic wrap and refrigerate for one hour.

Preheat the oven to 350˚ F and position a rack in the center. Once the dough is well chilled, transfer it to a lightly floured surface and roll out to fit your preferred tart pan. Transfer the dough to the tart pan and line the pan, pushing the dough into the fluted edges. Trim off the excess dough and patch any holes as needed. Line the pan with a piece of parchment paper or foil and fill with baking beads (rice or dried beans will also work). Bake for 10-15 minutes, until the dough is almost completely baked. Carefully remove the parchment or foil and baking beads.

To make the almond cream, combine the butter, honey, ground almonds, and eggs in a large mixing bowl. Whisk together until well blended and smooth. (This can also be done in a food processor.) Gently fold in the heavy cream with a spatula. Arrange the apricot halves in the partially baked tart dough. Pour the almond cream over the fruit so it fills the tart pan evenly. Bake 25-30 minutes until the almond filling is a light golden brown. Serve warm with a drizzle of honey, if desired.

Sunday, July 11, 2010

A Week At Pastry Boot Camp and a Strawberry Fig Tart


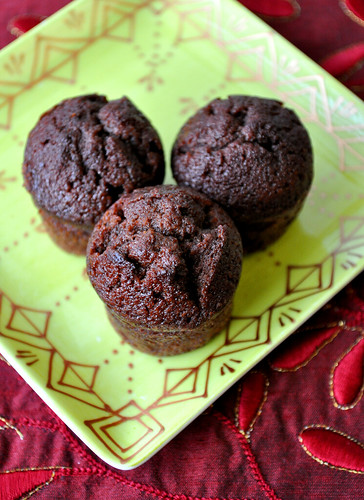
That's right boys and girls, a whole week of nothing but flour and sugar and French pastries. This post will be a bit picture heavy, but I promise, there will be a recipe in the end. You see, I've just completed the Pastry Bootcamp at the French Pastry School where under the tutelage of the wonderful Chef Kristen Ryan, I learned a bunch of back pocket recipes that I'll most definitely be making in the future. The most fantastic brioche recipe, rich and fabulous Chocolate financiers:

Chocolate Financiers

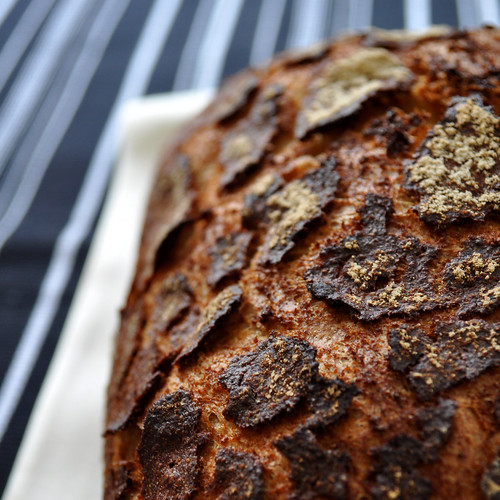
Fantastic bread brushed with a beer crust:

Beer Bread

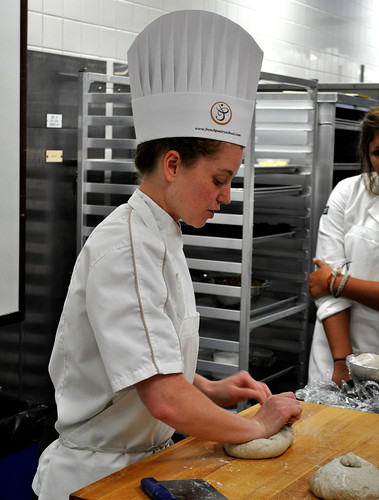
Here's Chef showing us how to shape the loaves before proofing:

Beer Bread

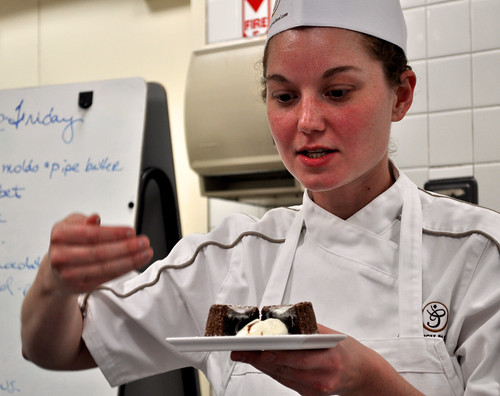
A smooth vanilla ice cream that shames all others, shaped into perfect little quenelle shapes over a warm chocolate lava cake:

Chocolate Lava Cake

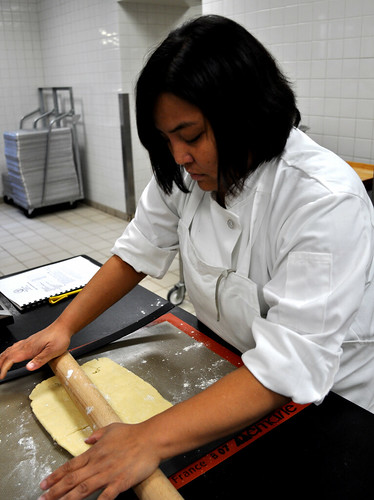
A classic fruit tart with the crust painstakingly shaped by hand with the help of my friend and partner Joy:

Joy Making Tart

The best pate de fruit I've ever had (kind of like marmalade candy), perfect little Madelines with just a slight hint of lemon:

Madelines

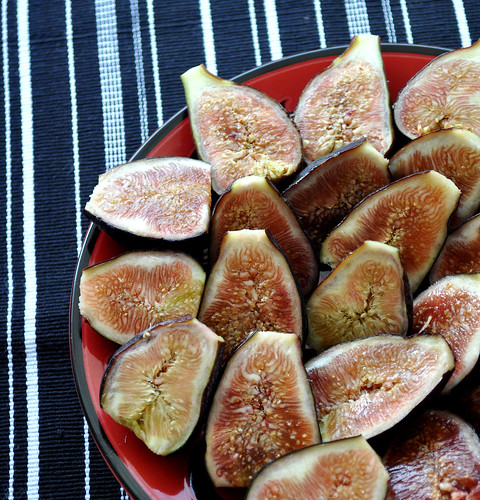
And lots and lots more. And every day, right after coming home after hours and hours in the kitchen, I'd get right back into it. How can I not when there are figs at the market?

Figs

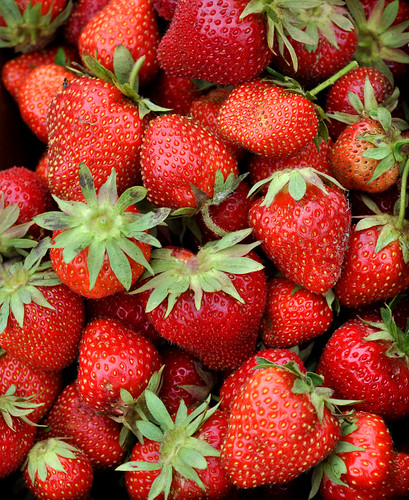
I don't know if I'm allowed to share the recipes I learned in class with the world yet, but until I know for sure, I'll leave you with one of the recipes I made on my own. It's got fresh figs from the market and strawberries from the last picking expedition:

Strawberries

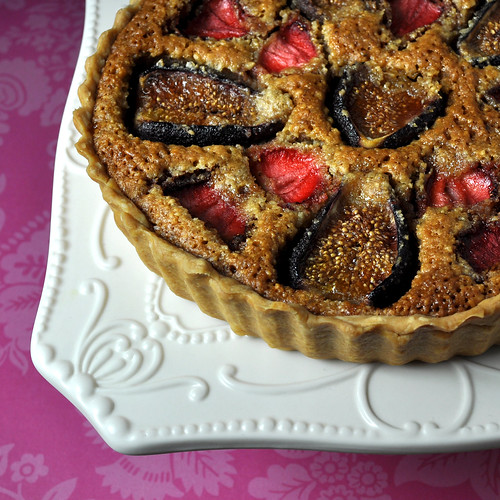
It's a slightly different crust then the one from the last post, and it was quite a bit easier to work with. The hazelnut pastry cream and the wonderful fruits made for a unique and very tasty treat.

Strawberry Fig and Hazelnut Tart

Strawberry Fig and Hazelnut Tart
via Martha Stewart Magazine, June 2010
Makes one 10-inch tart.


FOR THE CRUST
1 1/4 cups all-purpose flour, plus more for surface
1/2 teaspoon granulated sugar
Salt
1 stick cold unsalted butter, cut into small pieces
1/4 to 1/2 cup ice water

FOR THE FILLING
3/4 cup blanched hazelnuts, toasted
1/2 cup packed light-brown sugar
1/4 cup granulated sugar
1/2 teaspoon finely grated lemon zest
Salt
1 stick unsalted butter, cut into small pieces
2 tablespoons Armagnac or other brandy, such as Cognac
2 large eggs
1/2 teaspoon pure vanilla extract
8 ounces figs (about 7), trimmed and halved lengthwise
8 ounces strawberries (1 1/2 cups), halved if large

Make the crust:
- Pulse flour, granulated sugar, and 1/2 teaspoon salt in a food processor until combined.
- Add butter, and pulse until mixture resembles coarse crumbs with some larger pieces remaining, about 10 seconds.
- Drizzle 1/4 cup ice water evenly over mixture and pulse until mixture just begins to hold together (it should not be wet or sticky). If dough is too dry, add more water, 1 tablespoon at a time, and pulse.
- Press dough into a disk, and wrap in plastic. Refrigerate until firm, about 1 hour or overnight.
- Roll dough to a 14-inch circle (1/8 inch thick) on a floured surface. Fit dough into bottom and up sides of a 10-inch fluted round tart pan with a removable bottom. Trim excess dough flush with edges of pan using a knife. Refrigerate until firm, about 1 hour.
- Preheat oven to 350 degrees.
- Prick bottom of tart shell all over with a fork, and fill with pie weights or dried beans. Bake for 30 minutes. Remove weights, and bake until set, about 5 minutes more. Let cool. Leave oven on.

Make the filling:
- Pulse hazelnuts in a food processor until finely chopped. Add sugars, zest, and 1/4 teaspoon salt; pulse to combine. Add butter, Armagnac, eggs, and vanilla; pulse until mixture is almost smooth.
- Spread filling evenly into tart shell. Top with figs and strawberries. Bake for 30 minutes. Reduce oven temperature to 325 degrees; bake until set and dark brown on top, about 1 hour more. Garnish with whipped cream.

Tuesday, July 6, 2010

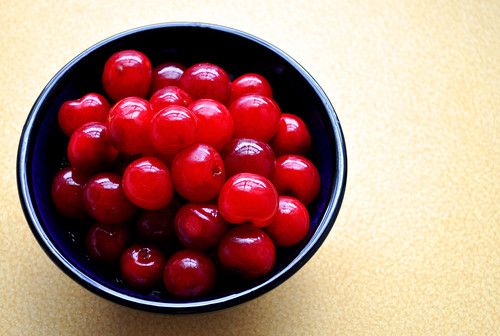
Sour Cherry Heaven

I'm usually pretty good with directions. It's not necessarily that I have an inner compass and always know where I am, but that I like maps and when one is not available, I usually have my trusty Tom Tom GPS, which only lies to me when I set it to the Irish brogue. Once in a while though I get cocky and I decide that I don't need these aides and that I totally know where I'm going. These are the times I get lost. Not completely and irreparably lost, mind you, because I usually still know which way is east and the general direction of where I need to be, but the take-the-back-streets-the-whole-100-miles lost. I like to call that the "Scenic Route". Sometimes, it's even pretty.

Sour Cherries

That's just what happened last Saturday morning as I was heading out to meet some friends at my favorite (or the only one I know) cherry orchard, Curran's Orchard. I went up there last year by myself and then shared the pickings with some friends, whose daughter remembered me when they were making plans to head up there this year and insisted that I join them. Since picking with friends is way more fun then going alone, I agreed and we made plans to meet there at 9am. I woke up early, packed up the car with cookies and cupcakes for a housewarming I'd be going to after picking (aren't they cute? the party was an Alice in Wonderland theme) and set out, being absolutely sure I knew exactly where this place was. An hour and a half later, I found myself at my favorite strawberry farm....about 40 miles away from the cherry farm. Dang. So much for my memory.


The day was beautiful and the 45 min drive from one farm to the next was lovely, but I still ended up getting there an hour after my friends, who were almost done with their picking. Not to worry, they said, "we'll help you pick!" And that, by the way, is why I love my friends.

Sour Cherries

Unfortunately, the late frost had killed a lot of the blossoms this year, and the recent series of storms have brought down a few of the trees, so the crop was very light and everyone was limited to 20 pounds of fruit to give more people the chance to try it. That means there will be no cherry liquor this year, but there will be pie! And ice cream! And since I split my crop with my mom, there will also be lots of yummy pastry thingies that have no name which she makes and we devour. Mmmmm. I love sour cherries.

I will have some extra super exciting stuff to share with you later this week because while it's been quiet here, I've been incredibly busy bouncing off the walls in excitement over what I'm up to this week. I'll give you a hint: there will be lots of butter, sugar, flour and absolutely NO DISHES to wash! While you're busy guessing, if you find yourself with some of this year's highly sought after sour cherries you can try out this wonderful recipe:

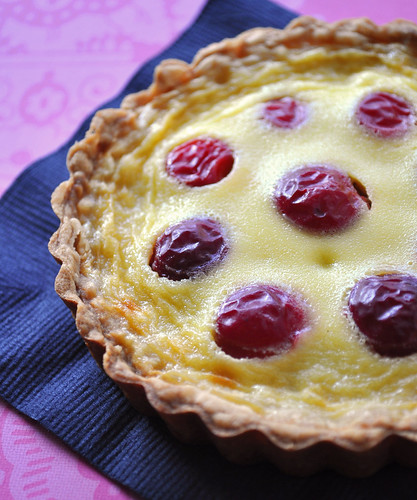
Sour Cherry Clafoutti Tart 2

Sour Cherry Clafoutis
via Martha Stewart, June 2010 issue

Tart Crusts:
1 stick unsalted butter, room temperature
2/3 cup confectioners' sugar
1 large egg yolk
1 cup all-purpose flour, plus more for dusting
Coarse salt

Filling
2 large eggs
2/3 cup creme fraiche or sour cream
1/4 cup granulated sugar
1 teaspoon pure vanilla extract
Table salt
6 ounces sour cherries (about 1 1/4 cups), halved and pitted

Crusts:
1. Beat butter and confectioners' sugar with a mixer on medium speed until smooth. Add yolk, and mix until combined. Add flour and 1/2 teaspoon coarse salt; mix until just combined.
2. Press dough into a disk, and wrap in plastic. Refrigerate for at least 1 hour or up to 3 days.
3. Set six 4-inch tart rings on a parchment-lined baking sheet. Roll out dough to 1/8-inch thickness on a lightly floured surface.
4. Cut out six 5 1/2-inch circles, rerolling scraps as needed. Press dough into bottoms and up sides of tart rings, patching any holes or tears. Trim excess dough flush with edges of rings using a knife. Prick bottoms of tart shells all over with a fork, and refrigerate until firm, about 1 hour. Meanwhile, preheat oven to 325 degrees.
5. Bake until pale gold, pressing down dough if puffing, about 20 minutes. Let cool.

Filling:
1. Raise oven temperature to 375 degrees.
2. Gently whisk together eggs, creme fraiche, granulated sugar, vanilla, and a pinch of table salt.
3. Divide mixture evenly among tart shells, and carefully drop cherry halves, cut sides down, into each. Transfer to oven, and bake until just set, 17 to 19 minutes. Let cool.

Tuesday, June 1, 2010

Bakewell What?


I hope you've all had a wonderful and relaxing Memorial Day weekend! There's nothing better then an extra day off work...unless you love your job, in which case I'm sure you still had fun. I spent the day at my parent's house where they unintentionally attempted to recreate the experience of a traditional churrascaria. While my dad whipped up lamb, chicken and pork kebabs on the grill, my mother, worrying about possible rain, roasted up a rack of lamb in the oven. Add to that three watermelons (everyone brought one worrying there wouldn't be enough) and enough dessert to send a person into a sugar coma, and you'll have an idea of what my Monday afternoon looked like.

Wanting to contribute, along with my watermelon contribution, I decided to make a Bakewell tart and use up the last jar of last summer's strawberry jam. This was a baking challenge a few months ago for the Daring Bakers and I had everything needed on hand, which made it perfect for a last minute treat. I used Tartlette's version of the tart, swapping the jams and simplifying the crust process by using a food processor. When making tarts, you can't go wrong with a recipe from someone who named her blog after them, and I think they turned out fantastic. I did have a hard time trying to explain to my family what the heck they were though. I mean isn't it sort of preposterous to say that the tarts are baked well? It's not like they're ruined steaks or something. Otherwise, it was a very easy and a very quick recipe to make, and I think wrapped up in a bit of wax paper, they'd make great "to go" treats to share. Leave the explanations for some other day.

P.S. I'd have shown you the beautifully layered inside of the tarts, but they disappeared pretty quickly, so you'll just have to make them yourself.

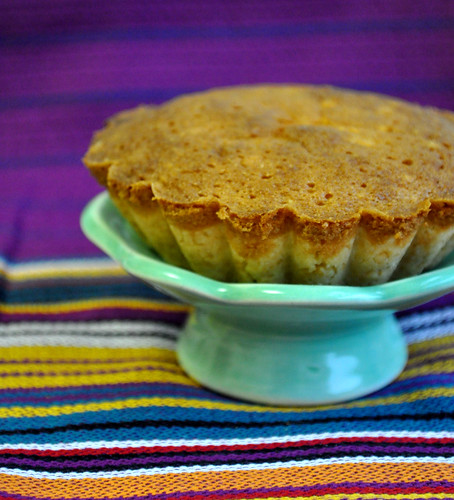
Bakewell Tart


Strawberry Bakewell Tarts
adapted from Tartlette

Notes: I'm listing the measurements and steps as I used them, but feel free to check out her instructions if you wish. I'm starting to prefer to weigh everything instead of going by cups/teaspoons.

Makes six 3-inch, two 2-inch, and one 6-inch tart...or 10 3-inch tartlettes

Sweet shortcrust pastry:
8oz all purpose flour
1oz sugar
1/2 tsp salt
4oz (1 stick) unsalted butter, cold
2 egg yolks
1/2 tsp almond extract (optional)
1-2 Tbsp cold water

Frangipane:
4.5oz unsalted butter, softened
4.5oz icing sugar
3 eggs
1.2 tsp almond extract
4.5oz ground almonds (or other nut of your choice)
1oz (2 Tbsp) all purpose flour

Jam or preserve of your choice (I used homemade strawberry jam)

Prepare the dough:
Sift together flour, sugar and salt into the bowl of a food processor. Cut up the cold butter into small cubes and dump into the bowl. Using just a few quick pulses, incorporate the butter into the flour until the mixture resembles bread crumbs. Set aside. Lightly beat the egg yolks with the almond extract (if using) and quickly mix into the flour mixture. Pulse two or three times. Keep pulsing while dribbling in the water, only adding enough to form a cohesive and slightly sticky dough.
Form the dough into a disc, wrap in saran wrap and refrigerate for at least 30 minutes.

Prepare the frangipane:
Cream butter and sugar together for about a minute or until the mixture is very light in color and very fluffy. Scrape down the side of the bowl and add the eggs, one at a time, beating well after each addition. The batter may appear to curdle, but it's okay, it'll come back together. After all three are in, pour in the almond extract and mix for about another 30 seconds and scrape down the sides again. With the beaters on, spoon in the ground nuts and the flour. Mix well. The mixture will be soft, keep its slightly curdled look (mostly from the almonds) and retain its pallid yellow color.

Assemble the tartelettes:
Place the chilled dough disc on a lightly floured surface. If it's overly cold, you will need to let it become acclimatised for about 15 minutes before you roll it out. Flour the rolling pin and roll the pastry to 5mm (1/4”) thickness, by rolling in one direction only (start from the center and roll away from you), and turning the disc a quarter turn after each roll. Don't worry too much if it rips, you wan always just fix it up in the molds. When the pastry is to the desired size and thickness, transfer it to the tart pans, press in and trim the excess dough. Patch any holes, fissures or tears with trimmed bits. Place the tarts on a baking sheet line with parchment paper and chill in the freezer for 15 minutes.

Preheat oven to 400F. Position a rack in the center of the oven.

Remove shells from freezer, spread as even a layer as you can of jam onto the pastry base. Top with frangipane, spreading to cover the entire surface of the tart or the jam will escape and burn. Smooth the top and pop into the oven for 30 minutes. Five minutes before the tart is done, the top will be poofy and brownish. Eat them warm or at room temp. Either way, they're great.